
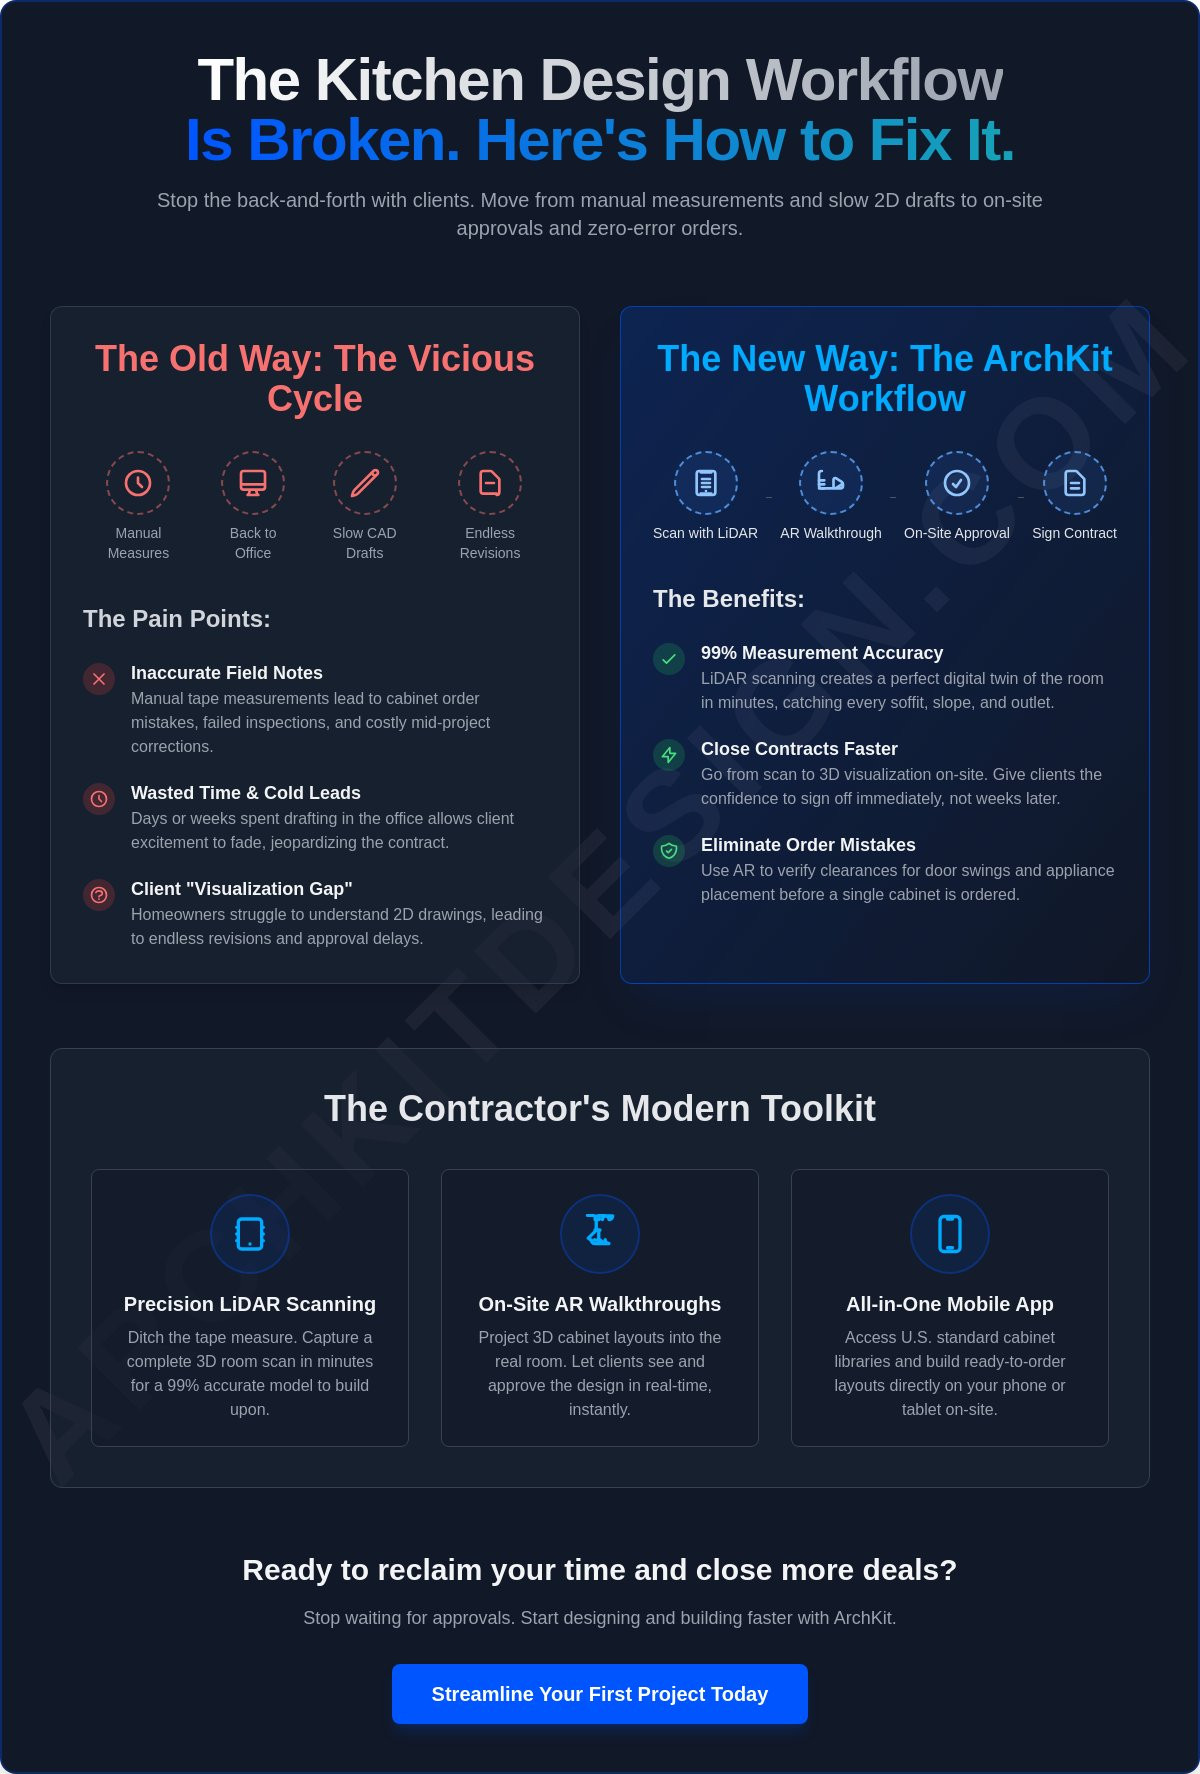
The most expensive tool in your kit isn't your table saw; it's the two weeks you spend waiting for a client to approve a 2D drawing they don't even understand. You know the frustration of the traditional kitchen design approval process. You take manual measurements, drive back to the office, and wait for CAD drafts while the lead goes cold. Inaccurate field notes often lead to mid-project corrections, and 2026 NEC updates mean even a small outlet placement error on a kitchen island can trigger a failed inspection. It's time to stop the back and forth.
We agree that your time belongs on the jobsite, not behind a desk. This article teaches you how to use modern AR tools and LiDAR scanning to visualize cabinet layouts instantly. You'll learn to provide faster on-site approvals and ensure zero-error cabinet orders. We'll show you how to navigate complex requirements, like the 6 to 12 week approval timelines common in Chicago high-rises, by using ArchKit to create 3D visualizations on the spot. From mastering new safety codes to closing contracts faster, here is your efficiency checklist for a modern workflow.
Key Takeaways
- Replace manual tapes with LiDAR scanning for high-precision measurements. Save hours on every site survey while eliminating field note errors.
- Streamline your kitchen design approval process by moving from raw data to 3D visualization in minutes. Close contracts faster by giving clients immediate visual confidence.
- Eliminate cabinet order mistakes. Verify technical clearances for door swings and walkway paths directly within your digital layout before the first unit is shipped.
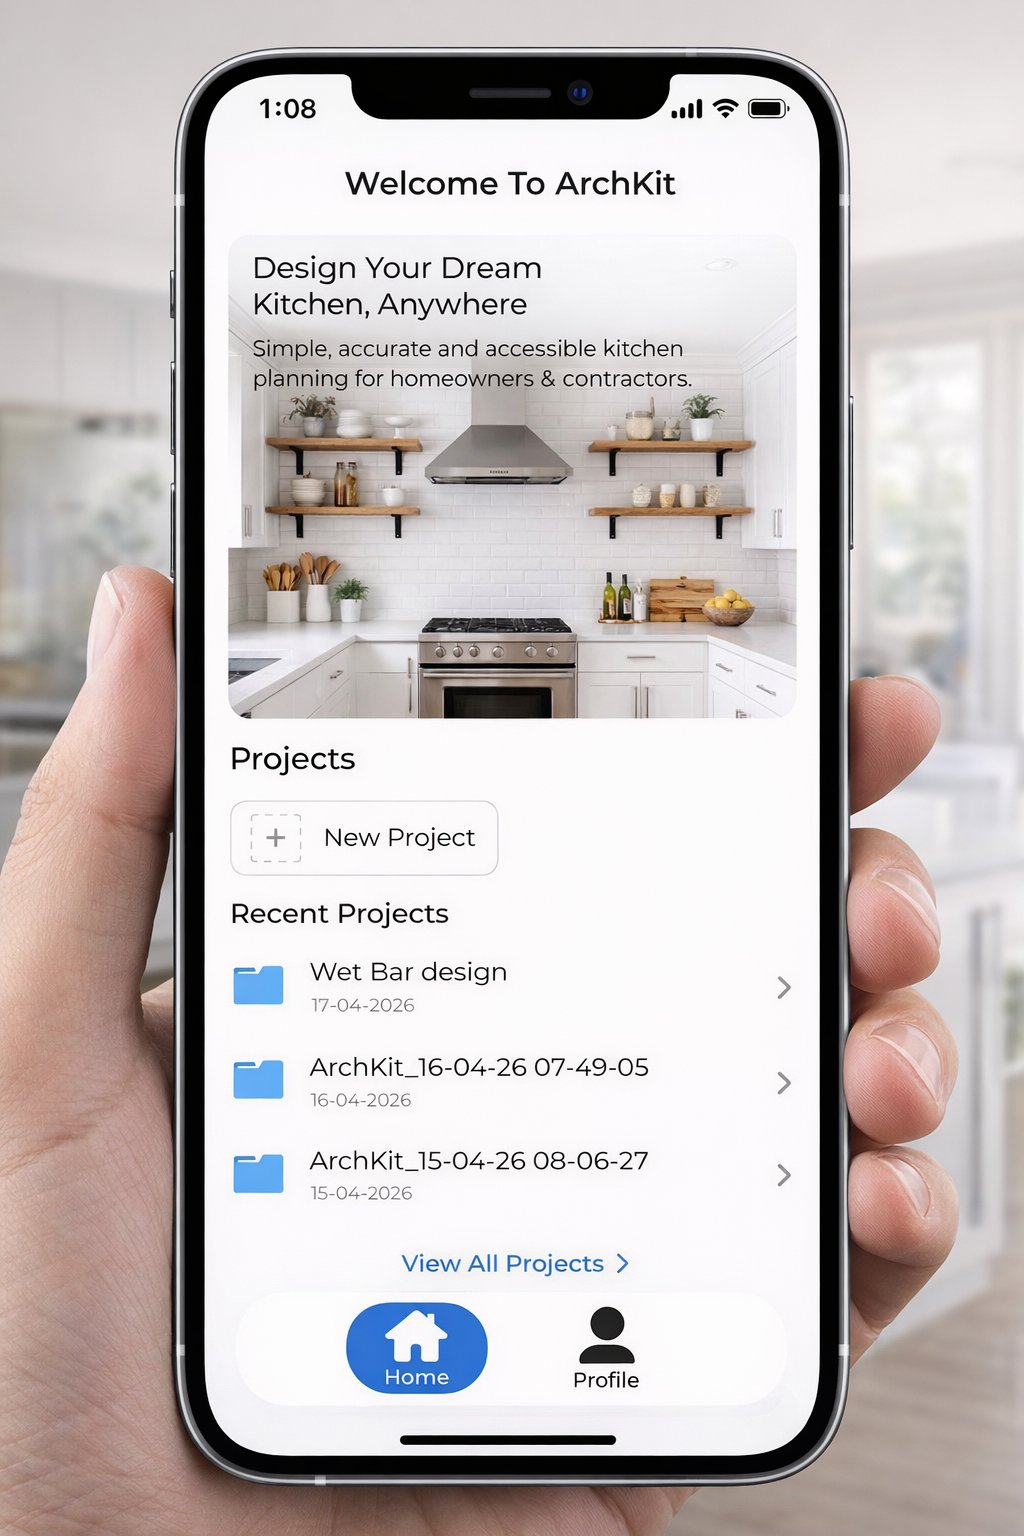
- Leverage ArchKit to integrate AR visualization and mobile workflow tools into every project. Access standard U.S. cabinet sizes to build accurate, ready-to-order layouts while still on-site.
Phase 1: The Pre-Design Site Survey and Brief
Every profitable project begins with an accurate baseline. If your initial data is flawed, the entire kitchen design approval process becomes a series of expensive corrections. You don't just need a floor plan; you need a comprehensive map of the existing environment. Start by defining the project scope and budget constraints before you touch a single cabinet door. A client with a high-end vision and a mid-range budget is a recipe for endless revisions. Lock in the "must-have" list early to keep the design phase focused and fast.
The LiDAR Advantage in Site Surveying
Tape measures lie. A slight tilt or a misread digit leads to a cabinet that won't fit, a delayed schedule, and a frustrated homeowner. Manual measurements are the primary cause of revision-heavy approval cycles. Modern contractors are ditching the tape for a LiDAR kitchen measurement tool. This technology captures 3D room data in minutes, creating an instant digital twin of the space.
Scanning the room with ArchKit ensures you capture the exact location of every soffit, window casing, and floor slope. It eliminates measurement callbacks. You walk away from the site with a 99% accurate model, allowing you to identify structural obstacles like load-bearing columns or plumbing stacks immediately. This level of precision builds trust. When you show a client that you've accounted for every fraction of an inch, the path to approval is much smoother.
Establishing the Design Brief with the Client
Once the room is scanned, align with the client on functionality. Effective design relies on the kitchen work triangle, but modern lifestyles often demand specialized zones for coffee stations or prep areas. Document every appliance early. You need more than just the width; you need the specific clearance requirements for refrigerator doors and oven swings.
Pay close attention to the 2026 NEC updates during your survey. If you're planning a kitchen island, remember that outlets can no longer be installed on the vertical sides to meet countertop requirements. Identifying these constraints now prevents a failed inspection later. Finalize the design brief by setting clear expectations for the kitchen design approval process. Define the milestone dates and the specific points where the client must sign off. This professional structure keeps the project moving and ensures you get to the contract phase without unnecessary delays. Measure once. Scan everything. Move on.
Phase 2: Schematic Design and 3D Visualization
Data without visualization is just a spreadsheet. Once you have captured the room with a LiDAR scan, the next step in the kitchen design approval process is transforming that raw data into a functional schematic. You don't need to head back to the office to start this. Use your mobile device to generate a preliminary 2D floor plan directly from the scan data. This immediate transition keeps the momentum of the initial site visit alive. It allows you to move from measuring to designing while you're still standing in the client's current kitchen.
In this phase, speed is your greatest asset. Start by placing standard U.S. cabinet sizes into the digital layout. Use 3 inch increments to build a realistic base. This isn't about high-resolution textures yet; it's about spatial flow. Check the island clearances. Verify the distance between the range and the sink. By using a mobile kitchen layout software, you can show the client exactly how the new footprint impacts their daily movement before they ever sign a contract.
The Power of On-Site AR Walkthroughs
Blueprints are flat. Reality is 3D. Most homeowners struggle to translate a 2D line drawing into a physical space. This "visualization gap" is where most delays happen. Augmented Reality (AR) solves this by projecting your digital layout onto the physical walls of the room. You aren't just showing them a picture; you're letting them walk through their future kitchen.
Project the base cabinets. Show the height of the wall units. When a client sees a digital cabinet blocking a window in real-time, they can make an immediate decision. You can adjust the layout on your screen and watch the AR model update instantly. This real-time feedback loop slashes revision cycles. It replaces "let me think about it" with "that looks perfect."
Standardizing the Layout for U.S. Cabinetry
Efficiency in the kitchen design approval process depends on using industry standards. Stick to standard cabinet widths and depths during the schematic phase to ensure your initial estimate remains accurate. This approach allows you to follow National Kitchen and Bath Association (NKBA) guidelines for landing areas and traffic paths without custom-order headaches later.
- Verify Appliance Fitment: Ensure the 36 inch professional range actually has the required side clearances.
- Check Corner Access: Use standard blind base or lazy susan dimensions to prevent dead space.
- Confirm Walkways: Maintain at least 42 inches in work aisles to keep the space functional for multiple cooks.
By standardizing early, you bridge the gap between a beautiful concept and a buildable reality. You provide a professional presentation that feels like a finished product, building the trust necessary to close the deal faster. Stop guessing and start projecting.
Phase 3: Design Development and Technical Refinement
Vision sells the project, but technical precision builds it. You have already used AR to bridge the visualization gap. Now, you must translate that excitement into a buildable reality. This phase is where the kitchen design approval process shifts from general concepts to exact specifications. You aren't just placing boxes anymore. You are finalizing specific cabinet types, from specialty tall pantry units to blind base corners. Every decision now impacts your final margin.
Verification is your primary task. Check the technical clearances for every door, drawer, and appliance path. A beautiful layout fails if the dishwasher handle prevents a corner drawer from opening. Use your digital model to run these "clash detections" before you order a single piece of millwork. This level of scrutiny ensures that when you present the final technical drawings for client sign-off, you are presenting a guaranteed solution, not a rough draft.
Technical Accuracy: Manual vs. Digital Workflow
Legacy desktop CAD software keeps you tethered to an office chair. It forces a disconnect between the jobsite reality and the drafting table. Comparing that to a mobile tool like ArchKit reveals a massive efficiency gap. Manual workflows rely on hand-written notes and repetitive data entry. This creates a high risk for mathematical errors in cabinet run calculations. One miscalculated filler strip can throw off an entire wall of cabinetry.
Most industry guides treat design and estimating as separate, disconnected tasks. This is a mistake that leads to "sticker shock" during the final approval. By using an integrated mobile workflow, your 2D and 3D cabinet layout tool automatically generates a comprehensive cabinet list and material estimate as you design. You don't just see the kitchen; you see the cost. Automating this transition from design to a professional bid ensures your pricing is as accurate as your LiDAR scan. It eliminates the "back-and-forth" between the design desk and the estimating spreadsheet.
Client Collaboration and Final Revisions
Scope creep is the enemy of the kitchen design approval process. Clients often try to add "just one more thing" once they see the technical refinement taking shape. Manage this by using cloud-based sharing. Send updates to the client's mobile device immediately. This transparency keeps them involved and prevents surprises during the final sign-off meeting.
Use this phase to secure interim approvals. Don't wait until the end to confirm the island size or the placement of the microwave drawer. Lock these elements in as you go. When the client sees the final technical drawings, they should already be familiar with every detail. This collaborative approach builds a sense of partnership. It transforms the final approval from a stressful hurdle into a simple formality. You've done the work. You've verified the data. Now, get the signature and start the build.
Phase 4: The Design Approval Checklist for Contractors
The final gate before construction is the most critical. You have moved through scanning, schematic drafting, and technical refinement. Now, you need a fail-safe verification to prevent costly field errors. This final stage of the kitchen design approval process is where you lock in every detail. Don't rely on memory. Run through a rigorous checklist to ensure the digital model perfectly matches the physical reality of the jobsite.
Accuracy at this stage protects your profit margin. One missed electrical outlet or a refrigerator door that hits a pantry handle can eat your profit in hours of rework. Confirm that all dimensions in your final layout still align with that initial LiDAR scan. If you moved a wall or adjusted a soffit during the design phase, re-verify those points. Ensure your electrical and plumbing locations are marked exactly where the new cabinetry expects them to be. This is your last chance to catch a conflict on a screen instead of on the floor.
- Verify clear floor space: Check that your layout respects the 2026 NEC updates, particularly the ban on vertical-side island outlets.
- Confirm door swings: Open every digital cabinet and appliance door in your model to ensure zero interference.
- Align MEP locations: Double-check that sink plumbing and range gas lines match the centerlines of your new units.
- Finalize the spec list: Review every finish, hardware choice, and interior accessory with the client.
Pre-Construction Compliance Check
Codes change. Your design must keep up. Review local building codes for ventilation requirements and egress paths. For example, if you are working on a high-rise project in Chicago, you must account for specific HOA board approvals that can add months to your timeline. Ensure your design meets the latest safety standards for range hood venting and GFCI placement. If your project involves removing a wall, validate those structural changes with an engineer now. Getting these signatures early prevents a "stop-work" order later.
The Final Presentation: Closing the Sale
This is the moment of truth. You aren't just asking for a signature; you are providing peace of mind. Use your 3D model as the "Source of Truth" for the entire project. When a client sees the exact kitchen they are paying for projected into their current space, the "sales" part of the job is already done. Learn how to increase your closing rate by leading with data and visualization rather than static sketches.
Handle last-minute objections with confidence. If a client is worried about a walkway feeling too tight, show them the exact measurement in the AR model. When they see the 42 inch clearance in a real-world projection, their hesitation disappears. Secure the signature on the formal Contract Documents and specification list. You are ready to build. To start using these high-velocity tools on your next project, get early access to ArchKit today.
Phase 5: Accelerating Your Workflow with ArchKit
The kitchen design approval process shouldn't be a waiting game. Every hour you spend driving back to the office to "draw it up" is an hour a competitor could use to steal the lead. ArchKit changes the math. By integrating LiDAR scanning and AR visualization directly into your site visit, you compress days of drafting into minutes of on-site action. You don't just take measurements; you build the solution while standing in the room.
Stop carrying a tape measure and a clunky laptop. Use your mobile device to access a full catalog of standard U.S. cabinet sizes. You can build a 3D layout in real-time, snapping units into place with LiDAR precision. This isn't just about convenience. It's about eliminating the stationary office drafting equipment that slows your business down. You walk in as a contractor and leave as a high-tech professional with a signed contract. Scan. Design. Approve. It's that fast.
Why Modern Contractors are Switching to Mobile CAD
The shift is clear: site-first design is the new industry standard. Traditional office-bound workflows create administrative fatigue and unnecessary overhead. You lose momentum when you separate the survey from the design. Moving to a mobile CAD environment reduces these costs and eliminates the need for expensive software licenses that only run on desktop workstations. It keeps you competitive in a 2026 market where homeowners expect instant results and total accuracy. Delivering a professional presentation on the spot makes clients say "yes" before you even leave the driveway.
Next Steps: Modernizing Your Design Process
Look at your current stack. Evaluate your contractor tech tools to see where the bottlenecks live. If you're still using manual sketches and waiting for delayed CAD drafts, you're leaving money on the table. The kitchen design approval process is your best opportunity to impress the client and lock in the project budget early.
Try the ArchKit app to experience the LiDAR-to-Layout speed for yourself. It's built for the field, not the desk. You can check ArchKit pricing for professional subscription options that fit your project volume. Modernize your workflow. Close more jobs. Build faster. Your time is too valuable to spend it behind a desk when you could be on the jobsite.
Take Control of Your Project Pipeline
The days of manual tape measures and office-bound drafting are over. You have the roadmap to overhaul your kitchen design approval process by moving the entire workflow to the jobsite. By starting with LiDAR-powered precision, you eliminate the measurement errors that derail projects before the first cabinet is even ordered. You bridge the visualization gap with on-site AR, turning skeptical homeowners into confident clients in minutes.
Stop losing time to administrative fatigue. Access a standard U.S. cabinet catalog on your mobile device and generate accurate estimates while standing in the kitchen. This isn't just a tech upgrade; it's a competitive advantage that lets you close contracts faster and move straight to the build. You have the checklist. Now, you need the tools.
Get Early Access to ArchKit’s AR Design Tools and start modernizing your workflow today. It's time to build more profitably and reclaim your time. Success in 2026 belongs to the contractors who lead with accuracy and speed. Go build something great.
Frequently Asked Questions
What is the most common bottleneck in the kitchen design approval process?
The primary bottleneck is the delay between the initial site survey and the delivery of the first design draft. Traditional workflows force you to take manual notes, return to an office, and wait for CAD drafting. This gap often leads to "visualization fatigue" where clients lose interest or struggle to interpret static 2D blueprints. Moving the kitchen design approval process to the jobsite eliminates this friction by providing immediate visual results.
How does LiDAR technology improve kitchen measurement accuracy?
LiDAR improves accuracy by using laser pulses to create a high-precision 3D point cloud of the existing kitchen. It captures every wall deviation, floor slope, and plumbing location with millimeter precision. This technology removes the human error inherent in tape measures and hand-written notes. You walk away with a perfect digital twin that ensures every cabinet fits the first time without field corrections.
Can I use AR to show clients different cabinet styles on-site?
Yes, you can use Augmented Reality to project various cabinet configurations and layout options directly onto the client's walls. This allows homeowners to "walk through" different design possibilities in the physical room. It replaces abstract imagination with a realistic 3D experience. Use this tool to secure faster verbal approvals on specific elements like island placement or wall cabinet heights during the initial visit.
How many design revisions are typical for a kitchen remodel?
Typical kitchen projects often undergo three to five major revision cycles when using traditional, slow-moving methods. Using mobile design tools and AR visualization can reduce this to just one or two sessions. Real-time feedback allows you to make adjustments on your screen while standing in the room. You resolve objections instantly instead of waiting for a follow-up meeting next week.
Do I need a separate architect for the kitchen design approval?
A separate architect is usually only necessary for major structural changes, such as removing load-bearing walls or expanding the home's footprint. For standard kitchen renovations, a professional contractor using specialized software can manage the kitchen design approval process independently. Always check local building codes, especially in permit-heavy jurisdictions like Chicago where condo renovations require specific board approvals.
How can I speed up the transition from design to a signed construction contract?
Speed up the transition by delivering a professional 3D presentation and a detailed material estimate during your first or second site visit. Using ArchKit allows you to generate a cabinet list and visualization instantly on your mobile device. When the client sees the final result and the cost simultaneously, they gain the confidence needed to sign the construction contract on the spot.
Is mobile kitchen design software as accurate as desktop CAD?
Mobile kitchen design software is just as accurate as desktop CAD when it is powered by LiDAR scanning technology. It captures the same level of technical detail as professional survey equipment. These mobile tools are built specifically for the field environment. They often catch site-specific obstacles, like slightly out-of-plumb walls, that a designer sitting in a remote office might miss.
What documents are required for a final kitchen design sign-off?
Final sign-off requires three core documents: a comprehensive specification list, finalized technical drawings, and a formal construction contract. The specification list should detail every cabinet unit, hardware finish, and appliance model. Your technical drawings act as the "Source of Truth" for the build. This ensures both you and the client are perfectly aligned on the final footprint before demolition begins.


