
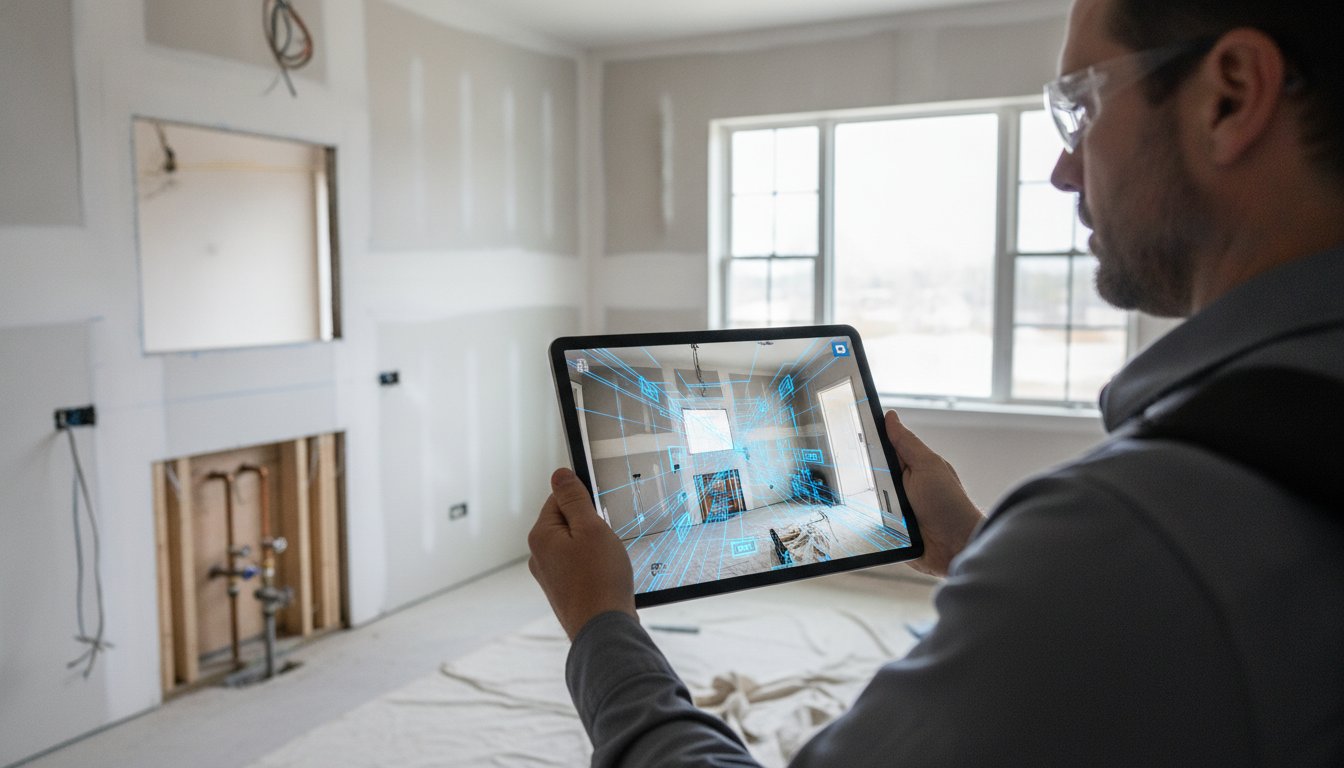
Traditional tape measure methods for as-builts carry an average error rate of 12 to 15 percent. In a high-stakes kitchen remodel, those "lost" inches lead to cabinet misfits and stalled projects. You've likely felt the sting of driving back to a jobsite just to verify one forgotten plumbing centerline. It's an expensive waste of time. By adopting LiDAR scanning for kitchen as-builts, you can capture every wall, outlet, and obstruction with less than 2 percent error on your first visit.
We understand that manual sketching is a slow process that delays your quotes and frustrates homeowners. This guide promises to show you how to replace the tape measure with a mobile workflow that generates 99 percent accurate as-builts and 3D layouts in minutes. We will explore how to use ArchKit to complete your measurements on-site and use instant 3D visuals to secure more contracts. It's about moving faster, eliminating revisions, and proving your professionalism before the first cabinet arrives.
Key Takeaways
- Slash measurement time by capturing a full kitchen perimeter in under five minutes using mobile sensors.
- Eliminate costly cabinet misfits by using LiDAR scanning for kitchen as-builts to achieve 99% accuracy on every dimension.
- Master a systematic scanning workflow to ensure windows, door casings, and obstructions are captured without missing a single detail.
- Use ArchKit to convert raw data into 3D cabinet layouts instantly, allowing you to present professional visuals before leaving the site.
- Learn pro tips for managing reflective surfaces and lighting to maintain high-quality scan data in any jobsite environment.
What is LiDAR Scanning for Kitchen As-Builts?
For years, "as-built" meant a crumpled sheet of graph paper and a handful of questionable measurements. Today, the standard has shifted. LiDAR scanning for kitchen as-builts uses light pulses to create a precise digital replica of a physical space. To understand what is LiDAR, think of it as a digital tape measure that fires millions of times per second. It doesn't just measure a single wall; it maps every corner, outlet, and plumbing line in one sweep. This technology creates a high-density point cloud that captures the exact reality of the jobsite.
While high-end surveyors use terrestrial laser scanners costing tens of thousands of dollars, residential contractors now have this power in their pockets. Modern iPhones and iPads use specialized sensors to capture jobsite data instantly. This isn't just about speed; it is part of a broader movement toward precision data collection, similar to how DroneWorksIQ provides advanced aerial intelligence for enterprise clients. For the kitchen remodeler, it's about building a project on a foundation of facts rather than estimates. You're moving from manual sketching to automated digital generation. It's the difference between guessing if a cabinet will fit and knowing it will.
How Mobile LiDAR Works on the Jobsite
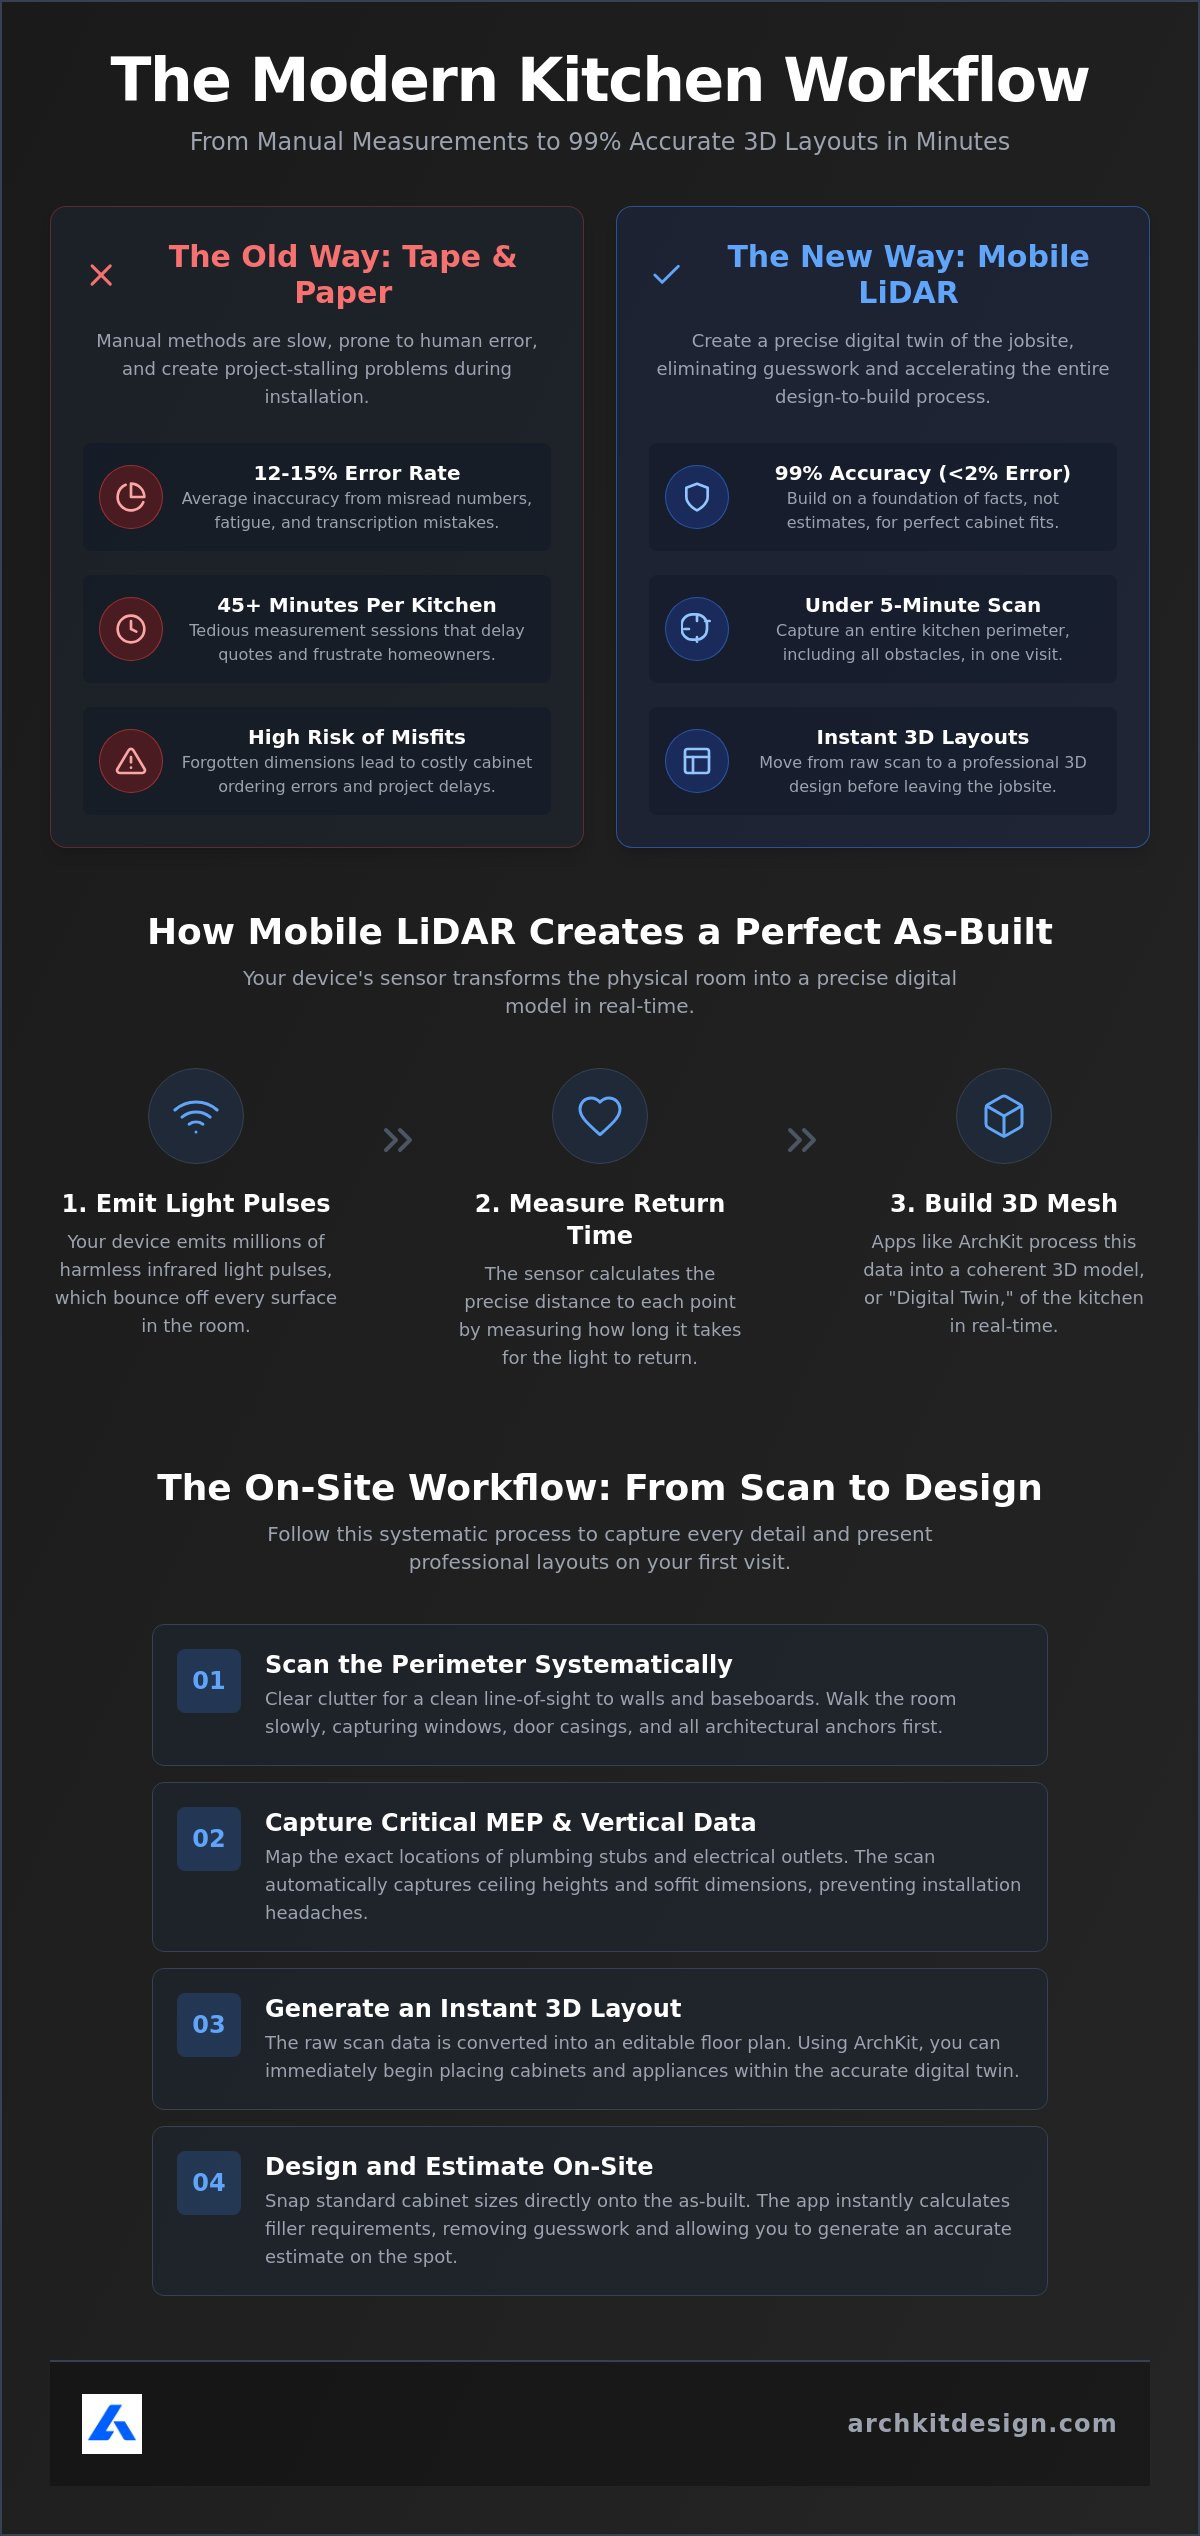
The process is simple. Your device emits infrared light that bounces off surfaces like cabinetry, soffits, and appliances. The sensor calculates the time it takes for that light to return, determining the exact distance of every object. Apps like ArchKit process this data into a coherent 3D mesh in real-time. You see the room take shape on your screen as you walk. If you miss a corner, the app shows a gap in the mesh. No more driving back to the site because you forgot the window casing width. You verify the data before you even pack up your tools.
The Evolution from Tape Measures to Digital Twins
Traditional methods rely on a tape measure and a laser disto. These tools are fine for a quick estimate, but they invite human error. Fatigue, misread numbers, and messy handwriting lead to mistakes that don't show up until install day. In fact, traditional manual methods have an error rate of 12 to 15 percent. LiDAR scanning for kitchen as-builts drops that error rate to less than 2 percent.
By moving to a digital workflow, you create a "Digital Twin" of the kitchen. This is a 1:1 virtual model that lives on your device. You can check clearances for a 36-inch range or verify cabinet depths without pulling a tape. Using ArchKit allows you to move from a raw scan to a 3D layout on-site. It turns a tedious 45-minute measurement session into a five-minute scan. Scan the room. Generate the layout. Win the job.
The Workflow: From Scanning to Permit-Ready Layouts
A successful scan starts with line-of-sight. Clearing the workspace isn't just about tidiness; it ensures the infrared pulses hit the actual wall, not a stack of boxes. When performing LiDAR scanning for kitchen as-builts, follow a systematic perimeter path. Walk the room slowly. Capture the windows and door casings first. These architectural anchors define the room's constraints. If the sensor can't see the corner, it can't map it. Move small appliances and clutter to get a clean read on the baseboards.
Capturing MEP locations is the next critical phase. You need to know exactly where the plumbing stubs and electrical outlets sit relative to your new layout. This process Improves Accuracy and Accountability across the entire project team. Once the scan is complete, the software converts the point cloud into an editable floor plan. No more waiting days for a draftsperson to return a file. You have a permit-ready layout before you leave the driveway.
Capturing Critical Kitchen Details
Scanning around obstacles like existing islands or heavy appliances requires a steady hand. Move around the object to ensure the sensor captures the floor and wall behind it. Don't forget the vertical data. Identify ceiling heights and soffit dimensions early. If you're planning 42-inch wall cabinets, knowing the exact soffit height prevents a massive installation headache. The scan captures these heights automatically, giving you a full 3D volume to work within.
Integrating LiDAR with Cabinet Catalogs
The real magic happens when you bridge the gap between a raw scan and actual hardware. While many tools leave you with a raw point cloud, LiDAR scanning for kitchen as-builts should lead directly to a design. ArchKit allows you to snap standard U.S. cabinet sizes directly onto the scanned as-built while you're still in the kitchen. If a wall is 120.5 inches and you place four 30-inch bases, the app instantly calculates the half-inch filler requirement. It's precise, fast, and eliminates the "math fog" that leads to ordering errors.
This automation removes the guesswork from estimating. You can generate a project estimate based on the actual scanned layout while the homeowner is still excited about the project. This immediate feedback loop builds trust and shortens your sales cycle. If you want to stop waiting for CAD files and start designing in real-time, you should get early access to the platform today.
Accuracy vs. Speed: Why LiDAR Beats Manual Measurement
A 200-square-foot kitchen takes roughly 45 minutes to measure by hand. You're juggling a tape, a laser disto, and a notepad. By the time you reach the third wall, fatigue sets in. Numbers get transposed. Handwriting becomes a mess. LiDAR scanning for kitchen as-builts slashes that time to five minutes. It isn't just faster; it's a total capture of the environment. While a tape measure gives you one point-to-point dimension, a scan captures millions of points simultaneously.
Traditional tolerance often hovers around a quarter-inch. For semi-custom cabinets, that's a gamble. A wall that's slightly out of plumb or a floor that's not level can ruin an install. LiDAR captures these deviations automatically. You aren't just getting the length of the wall. You're getting the "complete data" profile. This includes the exact placement of every obstacle you didn't think to measure, such as the exact protrusion of a window sill or the height of a baseboard heater.
The Cost of a Single Measurement Error
A single misordered pantry cabinet can cost $1,200 or more. That's just the material. Factor in the three-week lead time for a replacement. Your crew is standing around. Your project schedule is blown. The homeowner is frustrated. LiDAR scanning for kitchen as-builts acts as a digital insurance policy. By capturing 99 percent accurate data on your first visit, you eliminate the "oops" moments that eat your profit margins. One saved cabinet pays for the technology ten times over.
Speed as a Sales Tool
Speed isn't just for your benefit. It's a competitive edge. Most contractors take measurements, go home, and send a quote three days later. With a mobile workflow, you can present a 3D model to a homeowner before you leave their driveway. This immediate visual proof builds massive confidence. It reduces the back-and-forths because the client sees the layout in real-time. You can even use a free kitchen design app to test this speed on your next lead. Close the deal while the excitement is high. Don't let the momentum die in your home office.
Overcoming Common LiDAR Scanning Challenges
Jobsite conditions are rarely perfect. While LiDAR scanning for kitchen as-builts offers extreme precision, physical obstacles like mirrors and stainless steel can disrupt the sensor. Reflective surfaces cause "noise" in the point cloud, making walls appear further away than they are. To fix this, cover mirrors with blue tape or paper before you start. Stainless steel appliances can stay, but approach them from an angle to reduce direct reflection. Lighting also matters. You don't need studio quality, but "Construction Lighting" is essential. The sensor needs enough ambient light to track its own movement through the room.
Small galley kitchens and walk-in pantries present a different hurdle. In tight quarters, the sensor can lose its orientation if you move too fast. Use a "slow and steady" scanning motion. If you're dealing with existing cabinetry, scan around the boxes to capture the footprint. Don't worry about scanning inside every door unless you need specific plumbing depths. Capture the face frames and the floor-to-ceiling volume. This gives you the necessary constraints for your new layout without wasting time on irrelevant details.
Surface and Material Interference
Glass is a unique challenge. LiDAR pulses often pass through windows, creating a "ghost" room in your scan. Closing the blinds or using a reference marker on the glass solves this instantly. Dark, matte-finish cabinets are another issue. These surfaces absorb infrared light rather than reflecting it. If the mesh isn't forming, try moving closer or adding more light. In large, featureless open-concept spaces, place a few pieces of tape on long blank walls. These act as "anchors" to help the software track the distance accurately.
Best Practices for Field Reliability
Scanning is processor-intensive. A long day of back-to-back leads will drain your device battery quickly. Keep a portable power bank in your truck. To avoid motion blur, maintain a consistent pace. If you whip the phone around to see a corner, the point cloud will smear. Finally, always verify one or two "critical dimensions" with a physical tape measure. Checking a single 120-inch wall with a tape provides the ultimate sanity check for high-stakes custom cabinet orders. Ready to master your on-site workflow? You should get early access to our professional toolset today.
ArchKit: The Only LiDAR Tool Built for Kitchen Contractors
General-purpose scanning apps often leave you with a raw point cloud that requires hours of office work to become useful. ArchKit changes that. It is a specialized solution designed specifically for the kitchen and bath industry. When you use LiDAR scanning for kitchen as-builts with our platform, you aren't just capturing a room; you're building a project. You can move from a raw scan to an AR cabinet layout in seconds. This eliminates the "dead time" between the initial site visit and the first design draft.
The platform features a built-in catalog of standard U.S. cabinet sizes. You don't need to be a CAD expert to use it. Simply select a cabinet and snap it to the scanned wall. The software understands the architectural constraints captured during the scan, such as window heights and plumbing locations. This on-site functionality removes the need for expensive desktop software for your initial quotes. It keeps the entire design and estimating process mobile, allowing you to work where the project happens.
The ArchKit Advantage on the Jobsite
Field conditions are messy. You're often wearing work gloves or dealing with dust and noise. ArchKit features a no-nonsense interface built for these exact environments. The buttons are large, and the workflow is linear. You can capture the space, place your cabinets, and show the homeowner a 3D visualization immediately. This instant feedback loop is a powerful closing tool. It proves your professionalism and helps the client visualize their new space before you even leave. If you want to design on-site with ArchKit, the tools are ready when you are.
Team communication is also streamlined. Once a scan is complete, you can sync the project data across your entire crew. Your estimator back at the office sees exactly what you saw on-site. This shared "source of truth" reduces the back-and-forth phone calls about forgotten dimensions or unclear plumbing locations. It ensures that everyone is working from the same 99 percent accurate data set from start to finish.
Ready to Modernize Your Workflow?
Modernizing your business shouldn't be complicated or prohibitively expensive. We offer a simple pricing model tailored for small to mid-sized remodeling firms. You can view the details on our ArchKit Pricing page. Stop relying on outdated tape measures and illegible sketches. Start using LiDAR scanning for kitchen as-builts to protect your profit margins and impress your clients. The future of kitchen design is mobile, accurate, and immediate. You should get early access to the platform today and take control of your jobsite data.
Master Your Jobsite Data
Legacy measurement methods are costing you time and money. Adopting LiDAR scanning for kitchen as-builts replaces the frustration of manual errors with the confidence of digital precision. You've seen how mobile sensors capture 99% scan accuracy in under five minutes. No more return trips. No more misordered cabinets. This technology secures your profit margins and proves your professionalism on every lead.
ArchKit provides the specific tools you need for the field. Access a standard U.S. cabinet catalog on-site. Generate instant 3D visuals to win the contract immediately. This platform was built specifically for kitchen contractors who value efficiency over office-dependent workflows. Trade the tape measure for a modern digital twin. Start your free trial of ArchKit today and take control of your next renovation project with total accuracy.
Frequently Asked Questions
How accurate is LiDAR scanning for kitchen cabinets?
LiDAR achieves a dimensional accuracy of plus or minus 2 to 3 millimeters. This level of precision is essential for custom cabinet installations where even a small measurement error leads to expensive fillers or misfits. While traditional manual methods often have an error rate between 12 and 15 percent, LiDAR scanning for kitchen as-builts keeps the error rate below 2 percent. You get a reliable digital foundation for your entire project.
Do I need an iPad Pro or iPhone Pro to use LiDAR scanning?
Yes, you must use a Pro model because standard iPhones and iPads lack the specific hardware sensor. Supported devices include the iPhone 12 Pro through the iPhone 16 Pro and iPad Pro models from 2020 or later. ArchKit requires iOS 16 or later to process the millions of data points generated during a scan. These Pro devices are the only mobile tools capable of capturing professional-grade spatial data on-site.
Can LiDAR see through walls or behind existing cabinets?
No, LiDAR is a line-of-sight technology that only maps the surfaces the infrared light can hit. It cannot see through drywall, plumbing, or existing cabinetry. To get a complete room footprint, you should scan the visible perimeter during your first visit. If your project requires seeing "behind the scenes," you'll need to perform a follow-up scan once the demolition phase has cleared the workspace of old materials.
How long does it take to scan a typical kitchen for an as-built?
A standard 200-square-foot kitchen takes approximately five minutes to scan from start to finish. This is a significant time savings compared to the 45 minutes typically spent with a tape measure and notepad. Because the process is so fast, you can capture the entire room during your initial sales meeting. You leave the jobsite with a 99 percent accurate 3D model instead of a rough paper sketch.
Can I export LiDAR scans from ArchKit to other CAD software?
Yes, ArchKit supports exporting your data to industry-standard formats like DXF and OBJ. This flexibility allows you to integrate LiDAR scanning for kitchen as-builts into your existing design workflow. You can capture the initial measurements on your iPhone and then move the file to a desktop CAD program for final permit drawings. It bridges the gap between the physical jobsite and your professional drafting tools.
Is LiDAR scanning difficult for non-technical contractors to learn?
The learning curve is very low for anyone comfortable using a smartphone. If you can record a video, you can perform a professional room scan. ArchKit is built with a no-nonsense interface specifically for field professionals, avoiding overly complex technical jargon. Most contractors master the systematic walking path and scanning motion after just one or two practice runs in their own office.
Does LiDAR scanning work in low-light renovation environments?
LiDAR works well in low light because it uses its own infrared pulses rather than relying on visible light to measure distance. However, your mobile device still needs some ambient light so the camera can track its own movement through the space. In very dark renovation sites, using basic construction lighting ensures the software stays oriented and prevents the 3D mesh from drifting during the scan.
What is the difference between LiDAR and photogrammetry?
LiDAR uses active light pulses to measure the physical distance to a wall, while photogrammetry calculates depth by analyzing multiple 2D photographs. For kitchen contractors, LiDAR is the superior choice because it is faster and provides more consistent geometric accuracy. It creates a cleaner 3D mesh that is immediately ready for cabinet layout planning, whereas photogrammetry often requires more processing time and better lighting to be useful.


