
Imagine standing in a high-end kitchen. You're ready to reveal a digital layout. Suddenly, your AR cabinets are floating three inches inside the pantry. It's a gut-punch that happens when drift takes over your scan. You aren't alone. Research shows that 52% of construction rework stems from poor data about existing conditions. If you're tired of wasted trips and cabinet orders that don't fit, mastering the art of troubleshooting LiDAR scanning errors in kitchens is your only path to a profitable jobsite.
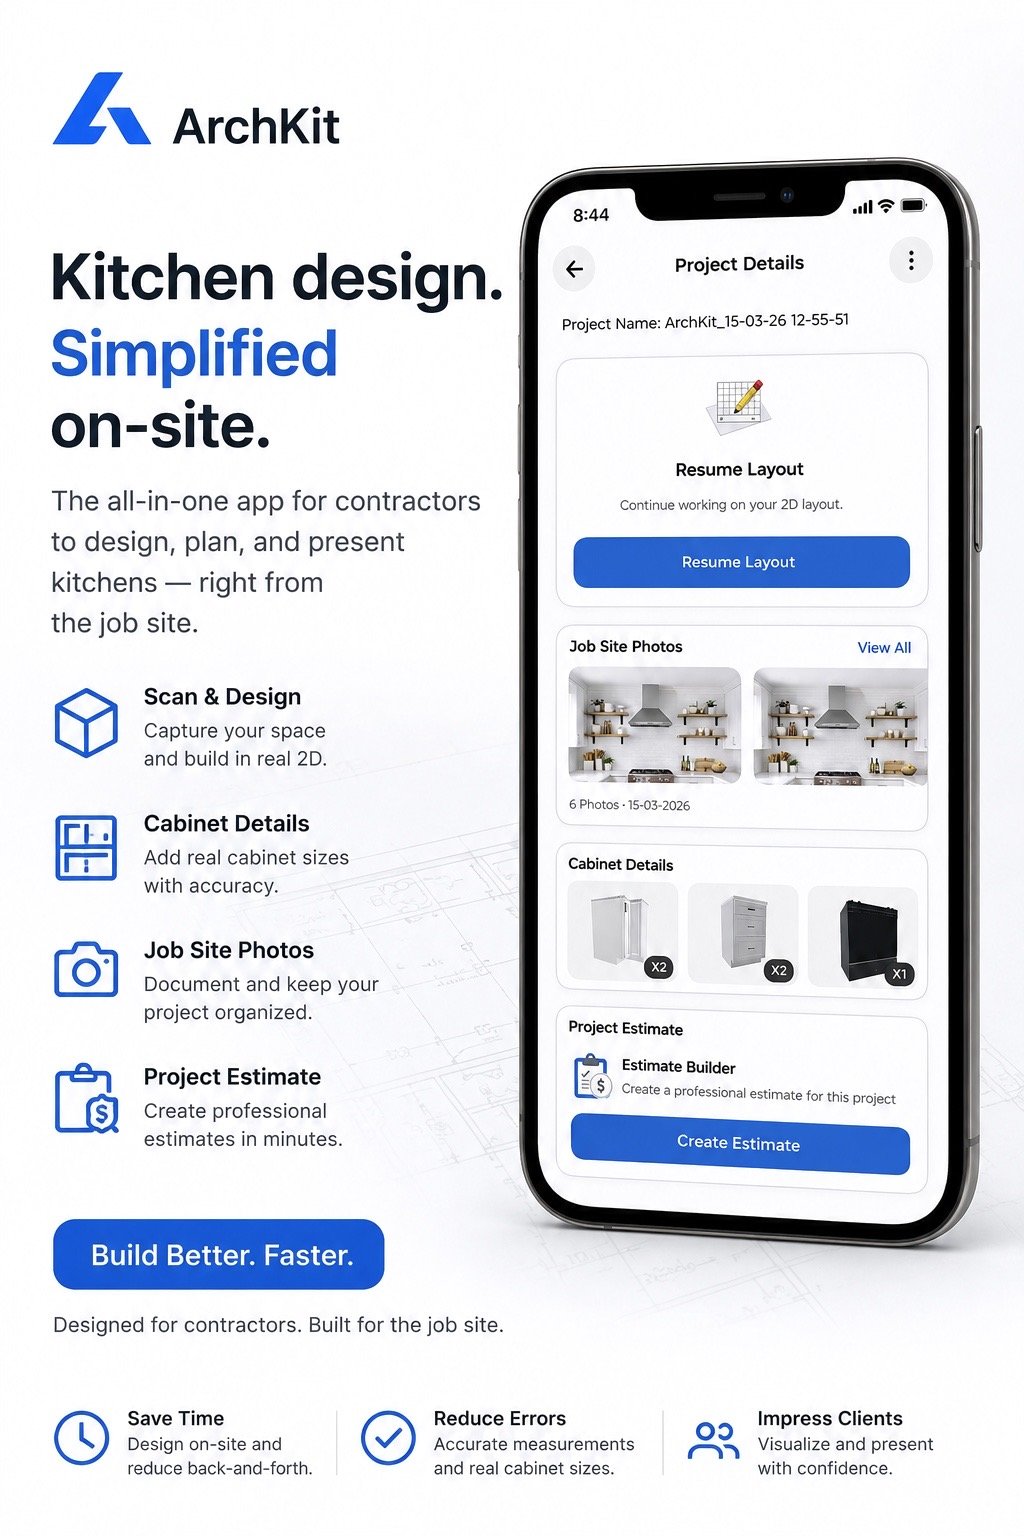
We understand the frustration of "noisy" data caused by the reflectivity trap of stainless steel and polished stone. You need tools that work as hard as you do. This guide delivers a field-tested workflow to stop drift before it starts. Learn how to handle reflective surfaces, manage scan overlap, and use ArchKit Design to secure accurate 2D and 3D floor plans in a single take. Stop re-scanning. Start building. Walk away from every site with total confidence in your digital measurements.
Key Takeaways
- Identify the "reflectivity trap" early to stop shiny surfaces like stainless steel from distorting your point cloud data.
- Detect SLAM drift in real-time to avoid the "curved wall" errors that ruin cabinet fitment and waste project hours.
- Implement a field-tested workflow for troubleshooting LiDAR scanning errors in kitchens, ensuring you never leave a site with a bad model.
- Leverage ArchKit’s AR visualization to verify digital anchors against physical measurements for zero-drift accuracy.
- Master pre-scan optimization techniques, from lighting control to clear scanner paths, to get a perfect 3D mesh in one take.
The Kitchen Reflectivity Trap: Why LiDAR Fails on Modern Surfaces
Kitchens are the ultimate stress test for reality capture. Bedrooms are easy. Kitchens are a minefield of light-deflecting obstacles. To understand why your scans fail, you first need to understand what is LiDAR? and how it calculates distance. The sensor emits rapid light pulses. It measures the time they take to bounce back. Polished surfaces break this loop. Instead of returning to the sensor, the pulse ricochets across the room. This is the reflectivity trap. It's the primary cause for troubleshooting LiDAR scanning errors in kitchens.
Stainless steel refrigerators are the worst offenders. They act like curved mirrors, scattering points and creating "noise" that looks like a cloud of static. Glass backsplashes and high-gloss cabinetry do the same. Even worse is Phantom Geometry. This happens when your scanner sees a reflection in a mirror and thinks there's a second room behind the wall. You end up with a floor plan that looks like a funhouse. Don't forget the sun. Intense sunlight hitting a window floods the area with infrared light. This washes out the sensor. It makes the scanner blind in specific zones, leading to massive gaps in your 3D mesh.
Managing Specular Reflections
Polished stone countertops are beautiful but brutal for lasers. They often cause pitting where the 3D mesh looks like it's been hit by hailstones. Fix this on-site. Apply small strips of blue painter’s tape to the counter edges. Give the laser a solid, matte target to hit. Change your angle of attack. Never scan a shiny surface head-on. Maintain a 45-degree angle to the surface. This ensures the pulse bounces away rather than flooding the sensor with direct, blinding feedback. Small adjustments in the field prevent hours of cleanup in the office.
The Glass and Mirror Problem
Identify mirror rooms early. If you see a duplicate room appearing on your screen, stop. You must physically obstruct the reflection. Lean a piece of cardboard against the mirror or use a temporary matte spray if the client allows it. Software masking helps later, but physical fixes save time now. Remember that dark, matte cabinetry presents the opposite issue; these surfaces absorb the signal entirely, leaving gaps in your data. Using a tool like ArchKit helps you spot these holes in real-time. You'll see the mesh form as you walk, allowing you to adjust your position and fill the gaps before you pack up your gear.
Identifying SLAM Drift and Alignment Errors in Kitchen Layouts
Mobile LiDAR relies on SLAM technology, or Simultaneous Localization and Mapping. It’s the digital brain that tracks your movement while building a map in real-time. When troubleshooting LiDAR scanning errors in kitchens, you’re usually fighting SLAM drift. This is the gradual loss of positional accuracy. It happens when the software loses track of its orientation relative to its starting point. In a kitchen, this often manifests as the "Curved Wall" effect. A perfectly straight 15-foot wall suddenly bows or curves in your digital model. If you don't catch this on-site, your cabinetry runs will appear two inches longer or shorter than reality. That's a guaranteed cabinet return and a blown budget.
Loop closure is your primary defense mechanism. The scanner needs to recognize a previously visited spot to "snap" the geometry back into place. If loop closure fails, you get duplicate walls or "ghost" islands floating in the middle of your floor plan. These aren't just visual glitches. They represent a fundamental failure in the coordinate system. Understanding the Sources of 3D Scanning Errors is vital for pros who can't afford a second site visit. You need to spot these misalignments on your mobile screen before you leave the driveway. Catch the ghost wall now, or pay for it during the install.
The Revision Loop: How Errors Scale
Small errors grow fast. A 1% drift at the pantry door scales into a failed island installation across the room. You can't fix this in the office with software alone. It requires a total re-scan. Check our LiDAR kitchen scanner app guide to see how baseline accuracy impacts your bottom line. Investing in professional-grade tools is an insurance policy. When you compare the cost of one mis-measured cabinet set to the ArchKit pricing, the math is simple. Accuracy pays for itself by eliminating the revision loop that drains your profit margins.
Geometric Misalignment
Watch for non-90-degree corners. Most residential kitchens are rectangular. If your scan shows an 87-degree corner, you likely have a scanning error, not a crooked house. Clutter is the main culprit. Piles of boxes, old appliances, or construction debris create "false geometry." They confuse the SLAM algorithm by providing too many irregular surfaces to track. Clear the scanner's path. Use high-contrast reference points, like a door frame or a window edge, to keep the algorithm anchored. If you want to streamline your field work and eliminate these measurement headaches, get early access to our latest mobile workflow tools today.
Pre-Scan Optimization: Preventing Errors Before They Start
Precision begins before you pull your phone out of your pocket. Most field errors aren't software failures; they're environmental oversights. If you want to avoid the headache of troubleshooting LiDAR scanning errors in kitchens, you must prep the site like a professional. Start with your physical path. Never walk backwards. It’s a recipe for disaster. Walking backwards increases the risk of tripping and causes jerky device movements that confuse the sensor. Move forward in a smooth, continuous loop. This steady motion provides the algorithm with a clean data stream, reducing the likelihood of SLAM drift and alignment errors that ruin your cabinet layouts.
Lighting is your next priority. LiDAR sensors hate extremes. Total darkness makes the camera lose tracking, while direct, high-noon sunlight through a window can blind the infrared sensor. Aim for the "Goldilocks" zone. Close the blinds to block harsh rays and turn on all overhead lights to create even, consistent illumination. Monitor your hardware too. Scanning is a CPU-intensive task. If your iPad Pro feels hot to the touch, it will throttle the processor to stay cool. This drop in power causes frame rate lag, leading directly to measurement inaccuracies. Cool the device in your truck's AC between scans to maintain peak performance.
Always establish a "Home Point." Pick a unique, stationary object near the entrance, like a door frame or a light switch. Start your scan here and end it here. This simple step triggers loop closure. It tells the software that the beginning and end of your journey are the same physical coordinate, which automatically snaps the geometry into a tight, accurate box.
Environmental Staging for Pros
Clear the decks. A kitchen covered in small appliances, cereal boxes, and construction debris creates "noise" in your point cloud. This clutter forces the scanner to process thousands of unnecessary points, increasing the chance of a crash. Move the toaster. Clear the island. Manage the client, too. If a homeowner or a pet walks through your frame, they create "human artifacts"—floating digital ghosts that distort your walls. Keep the room clear until the scan is locked. Decide on your cabinet strategy early. Keep all doors closed to capture the room's shell accurately. Opening them mid-scan changes the room's geometry and triggers alignment failures.
Hardware and Software Calibration
Clean your glass. A single fingerprint over the LiDAR sensor scatters the laser pulses. This smudge can add a 1/4-inch error to every wall, which adds up fast over a 20-foot run. Use a microfiber cloth before every survey. Verify your tools are ready by ensuring your kitchen design app for iPhone is updated. Developers frequently release patches that improve sensor filtering and noise reduction. Finally, run a "test cube" scan. Measure a known object, like a 36-inch countertop height, to verify the scale is perfect before you commit to the full survey. Accurate data in means accurate cabinets out.
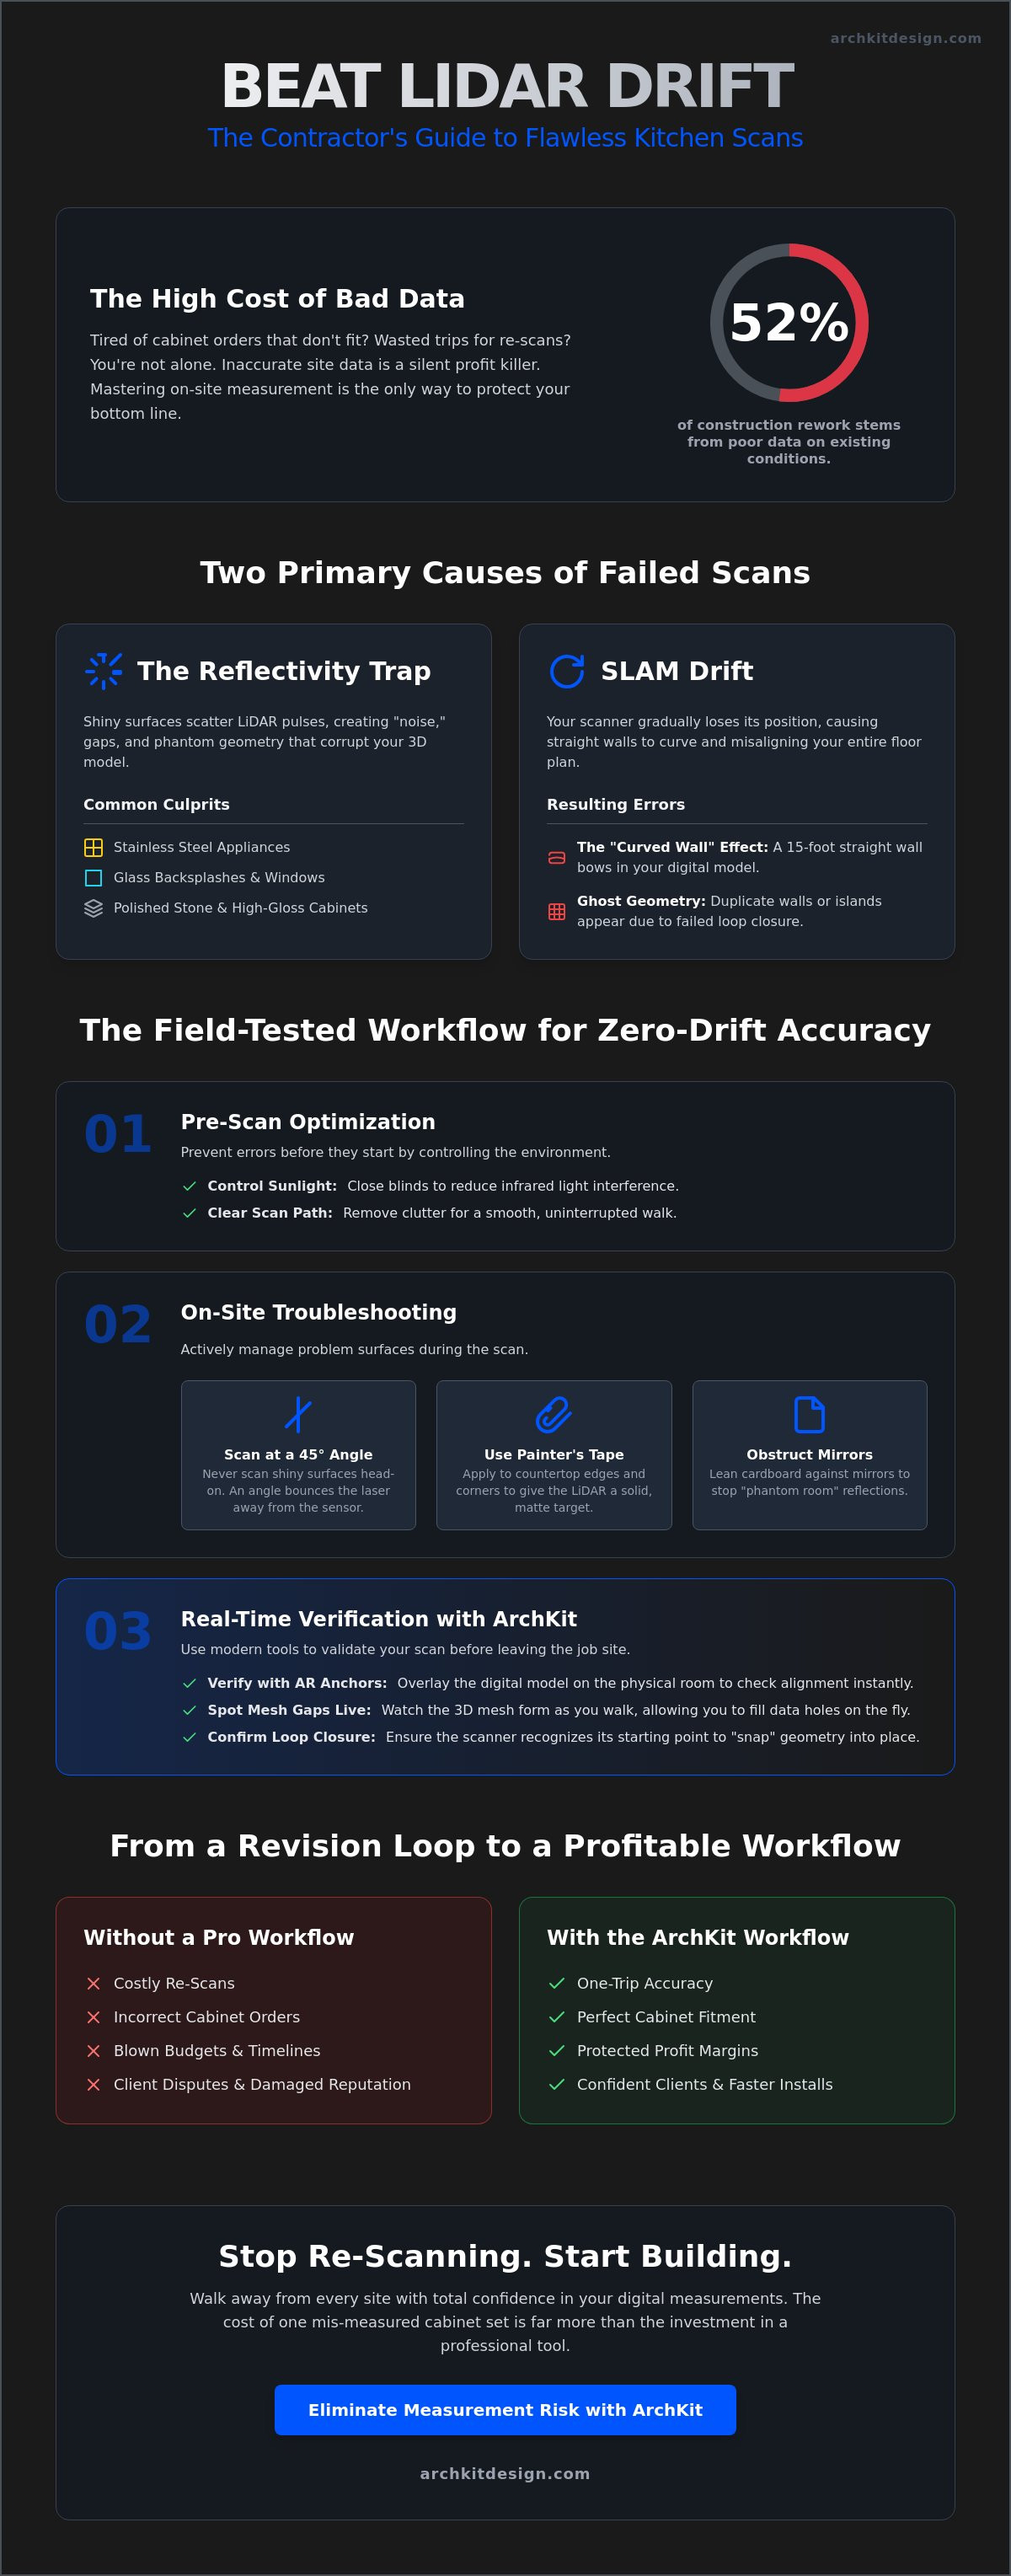
On-Site Troubleshooting: Real-Time Fixes for Failed Scans
Catch errors before you leave the jobsite. Waiting until you’re back at the office to review a point cloud is a recipe for wasted trips and lost profit. Real-time troubleshooting LiDAR scanning errors in kitchens saves your margins. Start by setting a "Reset and Re-Scan" threshold. If you see visible drift or a wall that bows more than 1/2 inch over a 10-foot run, stop. Delete the scan. Re-calibrate your path. It’s faster to spend three minutes re-scanning than three hours trying to "fix" a broken model in CAD. Don't fight a losing battle with bad data.
Verify your digital anchors with a manual override. Use a digital tape measure to check the distance between two fixed points, like the sink center and the pantry edge. Compare this to your LiDAR data. If the numbers don't match, your scan is drifting. For large, open-plan kitchens, use segmented scanning. Don't try to capture the dining room, kitchen, and living area in one massive loop. Break the project into smaller chunks. Scan the kitchen as its own zone. This limits the accumulation of SLAM errors. Identify "ghost" points early. These are floating data clusters caused by reflections or moving objects. Purge them in the mobile environment immediately to keep your mesh clean and readable.
Correcting Scale Discrepancies
Check your vertical scale. Use a standard 36-inch counter height as your reference. If your scanner thinks the counter is 34 inches, your entire model is compressed. Adjust your wall thickness settings to match the real-world as-builts. Most apps default to standard 4.5-inch interior walls, but older homes often vary. Use the ArchKit free trial to test these correction tools on-site. Seeing the 3D model overlay the physical room in AR makes scale errors obvious instantly.
Fixing Loop Closure Failures
Master the "Return to Start" technique. If your scan doesn't snap together at the end, walk back to your original home point. Hold the device steady. Give the algorithm time to recognize the features. This re-anchors the SLAM logic and often fixes drifted corners. If a specific junction point remains distorted, re-scan that corner specifically using a tighter, circular path. Use these productivity tools for kitchen contractors to manage your data flow and ensure every measurement is locked before you pack up your gear.
Ready to eliminate measurement risk and impress your clients with instant accuracy? Get early access to ArchKit and transform your on-site workflow today.
Eliminating Measurement Risk with ArchKit AR Workflows
Manual troubleshooting is a critical skill, but professional technology should do the heavy lifting. ArchKit’s engine is engineered specifically for the kitchen environment. It recognizes the difference between a structural wall and the "noise" created by a stainless steel fridge or a glass backsplash. This intelligent filtering stops errors before they ever reach your floor plan. You don't just scan and hope for the best. You watch the 3D mesh form in real-time as you walk the room. If a gap appears or a surface fails to register, you see it instantly. No more "ghost" points. No more guesswork. No more office-side cleanup.
ArchKit bridges the gap between a raw scan and a submittable cabinet estimate. It converts complex point clouds into clean, actionable data. The software automatically generates 2D plans while you're still on the jobsite. It highlights geometric inconsistencies that a human eye might miss during a manual survey. If a wall is out of plumb or a corner isn't square, the app flags it immediately. This level of automation is the ultimate solution for troubleshooting LiDAR scanning errors in kitchens. It turns a chaotic room into a precise digital twin in minutes.
Automated Accuracy Checks
Stop worrying about non-standard measurements or manufacturer delays. ArchKit includes built-in validation for U.S. standard cabinet sizes. It checks your scan against real-world manufacturing tolerances to ensure every box fits. If the app detects SLAM drift during the process, it alerts you with a visual warning. You can slow down or re-anchor before the error scales. This proactive approach ensures your baseline data is flawless. Secure the most advanced features and error-correction updates by joining our early access program today.
Winning the Bid with Precision
Speed wins contracts, but accuracy keeps them profitable. Use 3D kitchen visualization to show clients exactly how their new layout fits the existing space. This immediate visual proof builds massive trust. You aren't just a contractor with a tape measure; you're a pro with a digital twin. Digital workflows can reduce the cost of measurement errors by 90% by eliminating the "measure twice, cut once" anxiety. Walk away from every site knowing your cabinet order will fit the first time without a single revision.
Stop wasting time on site visits that yield bad data. Take control of your productivity and impress your clients with a seamless digital experience. Get early access to ArchKit’s precision scanning tools and start building with total confidence today.
Secure Your Profits with Field-Tested Accuracy
Precision on the jobsite is the difference between a profitable install and a costly revision. You now have the roadmap to handle the reflectivity trap and detect SLAM drift before it ruins your cabinetry layout. Successful troubleshooting LiDAR scanning errors in kitchens relies on preparation and the right digital tools. Clear your path, manage your lighting, and always verify your digital anchors against physical measurements before you walk away. Don't let a "ghost" wall or a curved corner dictate your project's success.
ArchKit removes the administrative fatigue of traditional surveying. Our engine is LiDAR-optimized specifically for kitchen environments, providing real-time mesh feedback and instant 2D and 3D layout generation. By integrating standard U.S. cabinet catalogs directly into the workflow, you bridge the gap between a raw scan and a final estimate with zero friction. It's time to modernize your trade and impress your clients with immediate, accurate results. You have the skills. Now, use the tech that matches your expertise.
Stop guessing and start scanning with ArchKit precision; Get Early Access today. Take command of your workflow and build every project with total confidence.
Frequently Asked Questions
Why does my LiDAR scan look "melted" around the kitchen cabinets?
Melted geometry usually results from signal absorption or scattering on high-gloss cabinetry. The laser pulses don't return to the sensor cleanly, which rounds off sharp edges. Clear the clutter and use blue tape on cabinet corners to provide high-contrast targets. This helps the sensor define edges sharply. ArchKit’s real-time mesh feedback allows you to see this melting effect instantly so you can adjust your angle and fix it.
Can I scan a kitchen with stainless steel appliances successfully?
You can scan stainless steel by avoiding direct perpendicular angles. The laser pulses ricochet off shiny surfaces, creating ghost data or noisy clouds. Approach the appliance from a 45-degree side angle. This forces the reflection away from the sensor and keeps your point cloud clean. If the noise persists, use a temporary matte spray or cover the surface with a sheet to lock the geometry for your layout.
What is the maximum accuracy tolerance for LiDAR in kitchen design?
Mobile LiDAR typically operates within a ±3-5mm tolerance. This range is sufficient for most initial layout and estimating tasks. However, custom cabinet installs often require even tighter margins. Always verify critical cabinet runs with a digital tape measure. Use ArchKit to anchor these physical measurements into your digital model. This hybrid approach ensures your 3D plan is accurate enough for final manufacturing and submittals.
How do I fix a scan where the walls aren’t at 90-degree angles?
Skewed angles are often a sign of SLAM drift. If a rectangular room appears trapezoidal, your loop closure likely failed during the scan. Re-scan the space immediately. Ensure you walk in a continuous forward path and return to your starting point. If the walls are physically out of square, use the manual adjustment tools in ArchKit to reflect the true as-built conditions for your cabinet layout.
Does lighting affect LiDAR scanning accuracy in a remodel?
Lighting is a vital factor when troubleshooting LiDAR scanning errors in kitchens. Avoid harsh, direct sunlight. It floods the infrared sensor and creates massive data gaps. Aim for even, ambient lighting instead. If the room is too dark, the visual tracking camera will fail. This causes the scan to jump or lose its orientation. Consistent lighting ensures the SLAM algorithm stays locked to the room's features throughout the survey.
What should I do if my LiDAR scanner loses its position mid-scan?
Stop moving immediately if the device loses its position. Walk back to your starting point or a recognizable feature like a door frame. Hold the device steady and give the software a moment to recognize the geometry. It should snap back into place once it re-localizes. If it stays lost, reset the scan. Never continue scanning while the position is unverified or you’ll accumulate massive drift.
Is it better to scan a kitchen empty or with existing cabinets?
Scanning with existing cabinets is usually better for remodeling. The cabinets provide unique geometric features that help the SLAM algorithm stay anchored to the room. An empty room with four plain walls can be harder to scan because the sensor lacks distinct landmarks. Just ensure the countertops are clear of small clutter. This reduces data noise and helps you capture the structural shell and plumbing locations accurately.
How often should I calibrate my iPhone or iPad LiDAR for professional use?
You don't need to calibrate the hardware manually. Focus on software and sensor health instead. Keep your iPad or iPhone updated to the latest OS. Check for updates in your contractor workflow app to ensure you have the latest noise-filtering patches. Before starting a survey, scan a known 36-inch counter height. This quick check verifies that your vertical scale is perfect before you commit to the full project.


