
A single measurement error of just half an inch can turn a profitable kitchen remodel into a week of unpaid revisions and cabinet reorders. You've likely felt the frustration of a cabinet misfit or a traffic flow that fails inspection because the kitchen layout dimensions didn't account for a 48 inch double-cook aisle. It's a waste of time and a hit to your reputation that no pro wants to take.
You deserve a workflow that eliminates the guesswork and the heavy code books. This guide delivers a definitive checklist of critical measurements and clearance requirements to ensure every project is accurate and code-compliant. We'll cover everything from 2023 NEC electrical standards to the latest NKBA landing space recommendations for 2026. These are the benchmarks that separate a functional workspace from a design disaster.
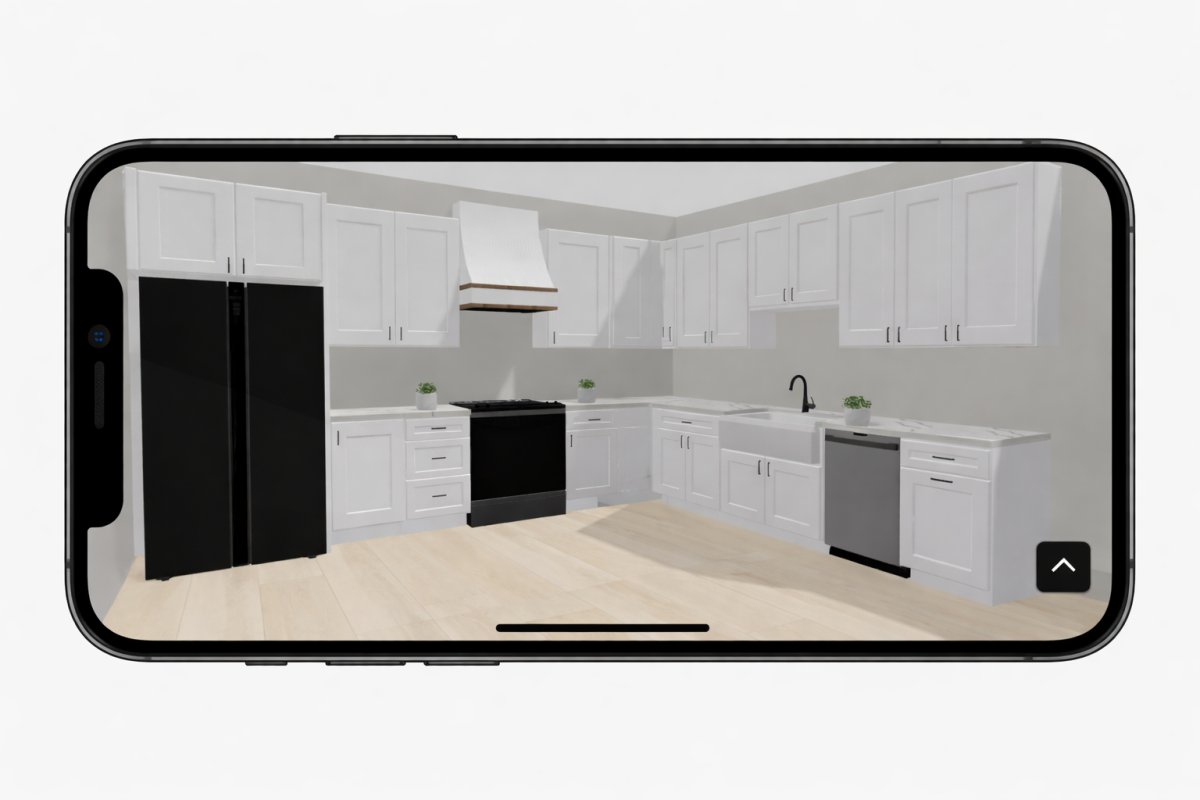
We will walk through the essential dimensions for islands, appliances, and work triangles while exploring how ArchKit Design helps you verify these specs instantly on-site. Get ready to speed up your estimating, reduce administrative fatigue, and build client confidence with precise, error-free layouts.
Key Takeaways
- Master the geometry of the work triangle by maintaining a total leg distance between 12 and 26 feet. This ensures a functional flow that clients will appreciate.
- Standardize your cabinetry installs using pro-grade kitchen layout dimensions to eliminate misfit errors and mid-project revisions.
- Plan precise landing zones for appliances like refrigerators and sinks to meet 2026 NKBA standards and improve jobsite compliance.
- Replace manual measurement fatigue with LiDAR scanning and AR tools like ArchKit Design to generate accurate 3D layouts directly on the jobsite.
- Use a multi-height wall verification checklist to catch structural variances before they cause cabinet installation delays.
Mastering the Work Triangle and Primary Layout Dimensions
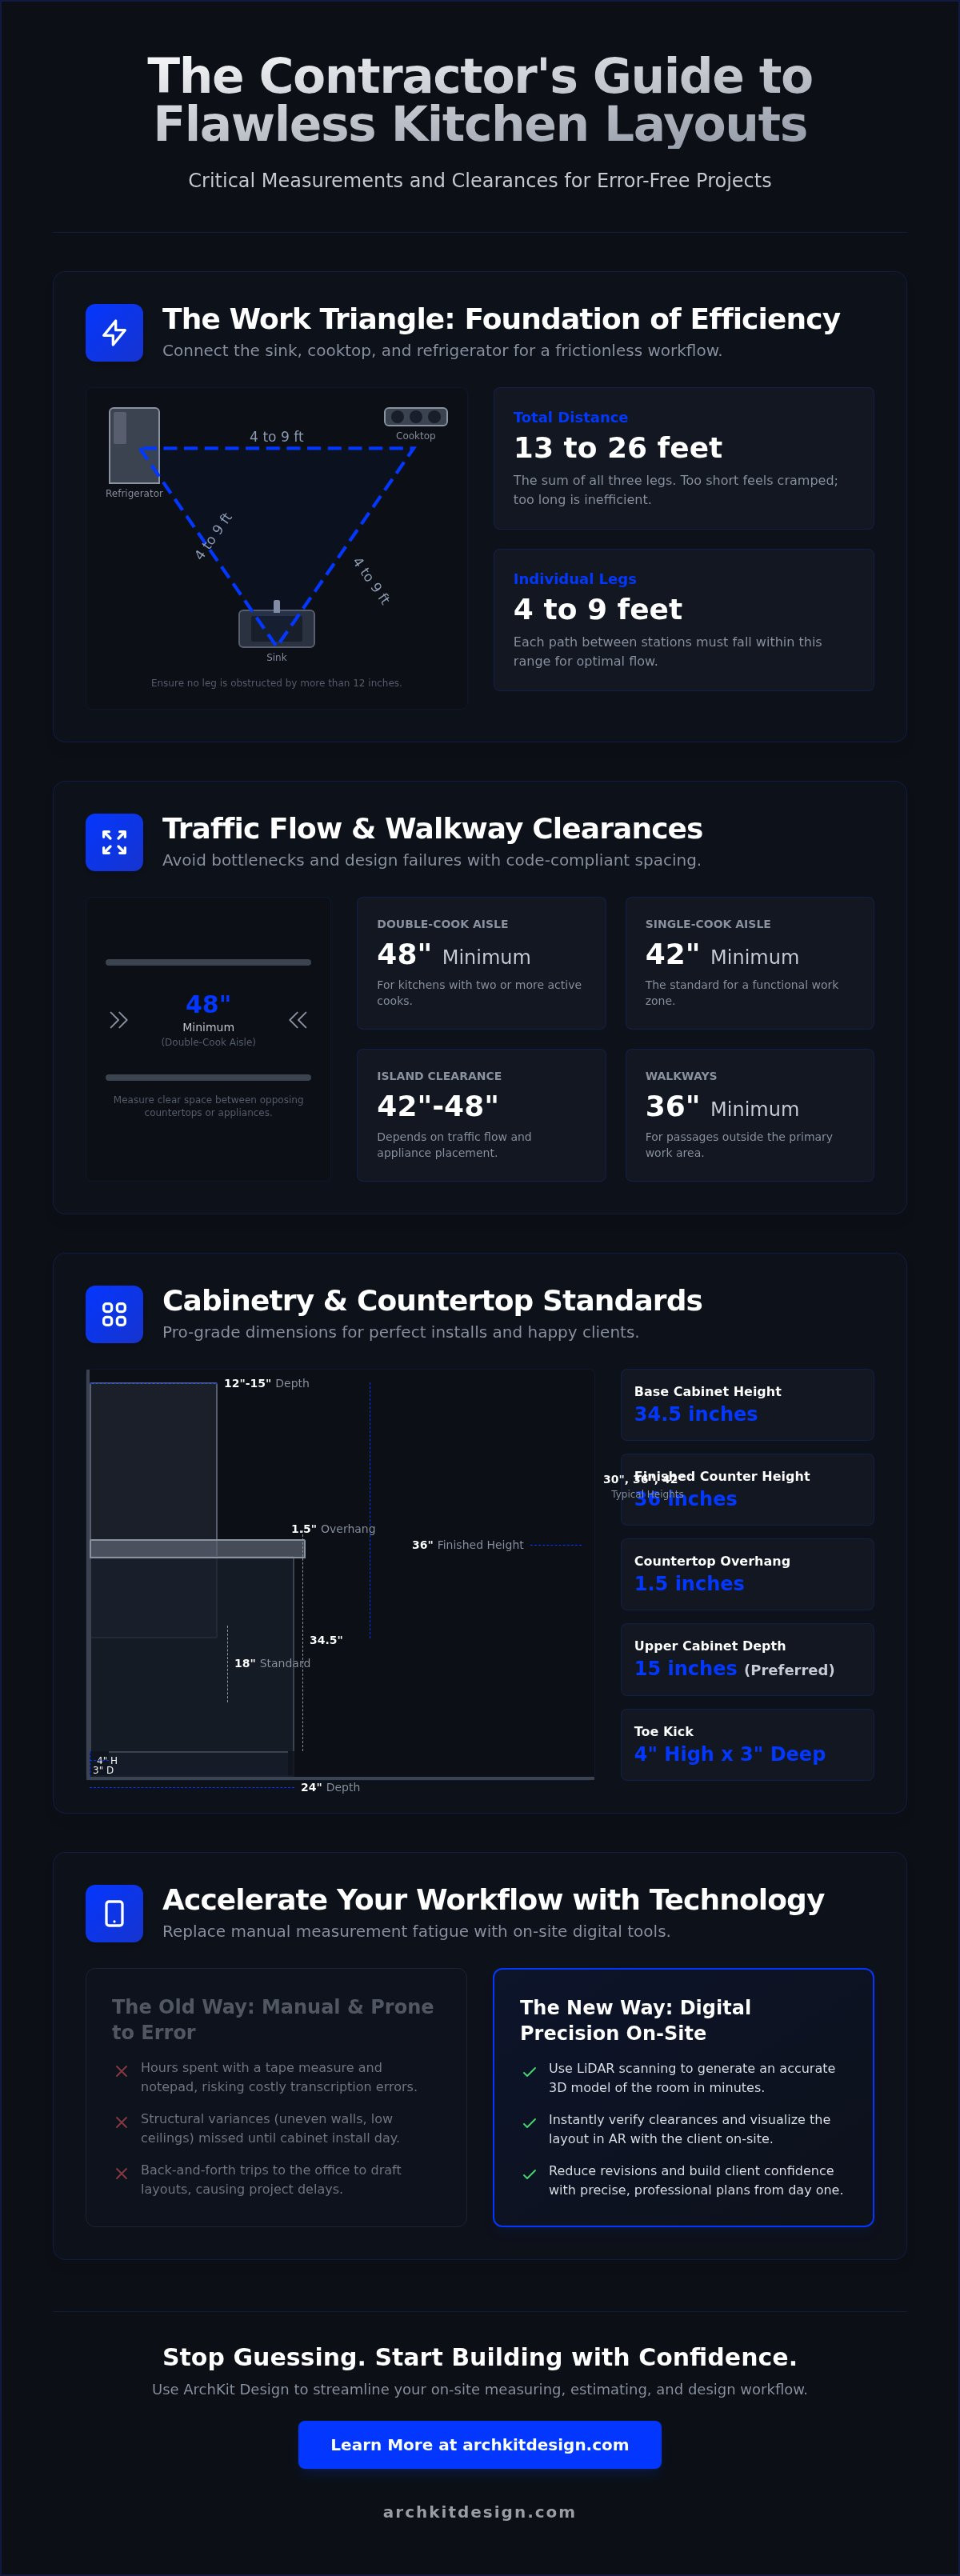
Efficiency in the kitchen starts with the kitchen work triangle. This classic design principle connects the three most frequent points of use: the sink, the cooktop, and the refrigerator. In 2026, clients expect a workspace that flows without friction. To achieve this, keep the sum of the three triangle legs between 13 and 26 feet. If the total distance is too short, the kitchen feels cramped; if it exceeds 26 feet, the user wastes energy moving between stations.
Precision is critical when setting your kitchen layout dimensions. Each individual leg of the triangle must measure between 4 and 9 feet. This standard applies across various configurations, whether you are framing a tight galley or a sprawling U-shaped layout. If an island sits within the triangle area, ensure it doesn't obstruct a direct path by more than 12 inches. Miscalculating these distances leads to poor traffic flow and frustrated homeowners.
NKBA Standards for Modern Work Zones
Modern design has evolved from the simple triangle into specialized "Work Zones." You now need to plan for prep, cooking, cleaning, and storage stations. Bottlenecks occur when these zones overlap too much or are placed in the wrong sequence. Keep the prep area near the sink and the storage zone near the refrigerator for maximum utility. For a deeper dive into these strategies, read our guide on Kitchen Layout Principles: The Contractor’s Guide to Functional Design. Deploy ArchKit Design on-site to visualize these zones in AR before any cabinets are ordered.
Traffic Flow and Walkway Clearances
Don't let narrow paths ruin a high-end remodel. A 36 inch clear width is the absolute baseline for passage through the kitchen. When you move into the active work aisle, the requirements increase to prevent collisions. Follow these verified clearance standards:
- Single cook aisle: 42 inches minimum.
- Double cook aisle: 48 inches minimum.
- General walkways: 36 inches of clear passage.
- Island clearance: 42 to 48 inches depending on the number of users.
Avoid common layout mistakes by checking appliance door swings and drawer extensions. A refrigerator door that blocks a main walkway is a major design failure. Verify these clearances on-site using LiDAR scanning to catch tight spots early. Catching these errors during the planning phase saves you from expensive field modifications later. Use these kitchen layout dimensions as your legal and functional baseline for every estimate.
Essential Cabinetry and Countertop Spacing Standards
Base cabinets form the structural foundation of every project and dictate the placement of all adjacent utilities. Standard kitchen layout dimensions for base units are 24 inches deep and 34.5 inches high. When you add a 1.5 inch countertop, you reach the industry-standard 36 inch finished height. Maintaining this consistency is vital for ensuring that plumbing rough-ins and electrical outlets align correctly with the cabinet backs and backsplashes. Any deviation from these heights can lead to costly on-site modifications during the appliance installation phase.
Upper cabinets require a different set of rules to balance storage capacity with workspace visibility. Most uppers are 12 inches deep; however, 15 inch depths are becoming the preferred choice for contractors in 2026 to accommodate oversized dinnerware and modern small appliances. You will typically source these in heights of 30, 36, or 42 inches. The choice depends on the ceiling height and whether the client wants a flush-to-ceiling look or space for decorative crown moulding.
Ergonomics and cabinet protection are often decided by small but critical measurements. A standard toe kick must be 4 inches high and 3 inches deep to allow for comfortable standing. For the countertop, a 1.5 inch overhang is the professional benchmark. This overhang isn't just for aesthetics; it diverts liquid spills away from the cabinet faces and hardware, extending the life of the finish. Neglecting these details often results in administrative fatigue when clients complain about ergonomic discomfort later.
U.S. Standard Cabinet Sizes for Accuracy
American cabinet manufacturers almost exclusively use 3 inch width increments. This starts at 9 inches for narrow spice pull-outs and scales up to 48 inches for large pantry units. Knowing these increments allows you to plan filler strips accurately during the initial walk-through. For corner configurations, a standard Lazy Susan or blind corner cabinet typically requires a 36 inch by 36 inch footprint on the floor. Using a Professional Cabinetry Layout Tool helps you map these stock sizes onto your field measurements without the need for manual sketches.
Backsplash and Upper Clearance Rules
The vertical distance between the countertop and the bottom of the upper cabinets is known as the "18 inch rule." This clearance provides sufficient room for common countertop appliances like stand mixers and coffee stations. If the layout includes light valances or thick under-cabinet lighting strips, you must account for that loss of height. A light valance can easily eat up 1 to 2 inches of clearance, potentially making the workspace feel cramped or blocking taller appliances.
Ceiling height considerations often dictate the final upper cabinet selection. In kitchens with 8 foot ceilings, 42 inch uppers will typically run to the ceiling when paired with a scribe or small crown. For 9 foot or 10 foot ceilings, you might stack cabinets or leave a gap for ambient lighting. Verifying these kitchen layout dimensions on-site prevents the errors common in office-dependent workflows. You can get early access to on-site visualization tools from ArchKit Design to confirm these vertical clearances in AR before the first cabinet is ordered.
Appliance Clearance and Utility Spacing Requirements
Appliances are the high-traffic hubs of any kitchen. If you don't nail the clearances now, your clients will feel the mistake every time they cook. Start with the refrigerator. It requires at least 15 inches of landing space on the handle side. This allows for immediate unloading of groceries and prevents traffic jams. Sinks are equally critical. Plan for 24 inches of countertop on one side for prep and 18 inches on the other for cleanup. These kitchen layout dimensions ensure the sink remains a functional workstation rather than a cluttered bottleneck.
Cooktops require their own safety buffers. Maintain a 12 inch minimum on one side and 15 inches on the other. This provides a safe spot for hot pans and active prep work. For dishwashers, proximity to the sink is non-negotiable. Stay within 36 inches of the sink edge. This simplifies plumbing rough-ins and prevents water from dripping across the floor during the transition from sink to rack. Using mobile kitchen layout software like ArchKit Design on-site helps you verify these utility placements against the actual wall studs and existing plumbing lines.
Door Swing and Obstruction Management
A common field error is forgetting to measure for refrigerator door depth. You must account for the door swing and handle clearance against adjacent walls or deep pantry cabinets. If the door cannot open past 90 degrees, the client cannot remove crisper drawers for cleaning. Similarly, oven and dishwasher doors need open-door "drop zones." Ensure there is at least 21 inches of clear floor space in front of the appliance when the door is fully extended. Ignoring these clearances leads to the type of kitchen layout mistakes that require expensive cabinet modifications after the install.
Ventilation and Range Hood Spacing
Range hood placement is a balance of safety and performance. The vertical distance between the cooktop and the hood should be 24 to 30 inches for electric units; for gas, increase that to 30 to 36 inches. If the hood is too high, it won't capture grease and steam effectively. If it's too low, it becomes a fire hazard. The hood width must match or exceed the width of the cooking surface. Catching ductwork obstructions early is easier when you visualize the project in 3D. Mapping these paths during the initial measurement phase prevents office-dependent delays and ensures your kitchen layout dimensions align with the home's structural reality.
The Contractor’s On-Site Measurement Checklist
Stop relying on a single horizontal measurement. Walls are rarely plumb and floors are rarely level. To capture accurate kitchen layout dimensions, you must verify wall-to-wall distances at three distinct heights: the floor, the midpoint, and the ceiling. This identifies bows in the drywall that could prevent a cabinet run from fitting. Use a corner as your primary benchmark to locate plumbing rough-ins and electrical outlets. Measuring from a consistent point ensures your 2D and 3D models align with the physical reality of the jobsite.
Locating utilities precisely is non-negotiable. Don't just mark the center of the sink. Measure to the exact center of the drain pipe and the hot and cold supply lines. Do the same for gas lines and dedicated 20-amp appliance circuits. These coordinates must be logged relative to your corner benchmarks. This level of detail prevents the administrative fatigue of correcting layout errors during the rough-in phase. Catching a misplaced outlet now is free; moving it after the backsplash is installed is a disaster.
Check for wall squareness using the 3-4-5 rule. If a corner is out of square, your countertop template will fail. Document every obstruction. Window casings, radiator pipes, and HVAC vents often consume space that isn't reflected in a basic floor plan. Even a 1/4 inch variation in ceiling height across the footprint can affect how you trim out upper cabinets or crown moulding. Use a laser level to find the high spot on the floor before you start your base cabinet layout.
Pre-Design Verification Steps
Measure window and door openings from outside-of-trim to outside-of-trim. Cabinets can't overlap casing. Identify structural columns or hidden soffits early. These elements dictate your maximum cabinet height and crown placement. If you are working with limited square footage, use the Small Kitchen Layout Planner to maximize every inch. Accurate kitchen layout dimensions in tight spaces require accounting for every fraction of an inch to prevent door-swing collisions.
Digital Verification: The 2026 Standard
The era of the manual tape measure is fading. LiDAR technology now allows you to map an entire room in 3D in seconds. "Good enough" measurements are the fastest way to kill your profit margins with unpaid rework. Digital tools catch the subtle floor slopes and wall tilts that manual tools miss. You can get early access to ArchKit Design to replace your manual checklist with a high-velocity digital workflow that ensures your layouts are code-compliant and error-free from the start.
Accelerating Your Design Workflow with AR and LiDAR Technology
Speed is the ultimate competitive advantage for contractors in 2026. While legacy remodelers spend days drafting floor plans back at the office, high-efficiency pros use on-site tech to generate results instantly. LiDAR scanning isn't just for accuracy; it's a workflow accelerator. It allows you to capture every kitchen layout dimensions and generate a full 3D room map while you are still standing in the client's home. This eliminates the "office lag" that often kills the momentum of a hot lead.
AR visualization takes your pitch to the next level by projecting standard cabinet sizes directly onto the existing walls. This immediate visual feedback loop reduces the cycle of endless revisions. When a client can walk through their new space in augmented reality, they gain the confidence to sign the contract on the spot. You move from measurement to estimate without the administrative fatigue of traditional CAD software. It's about closing the gap between the initial walk-through and the start of construction.
ArchKit Design: The Professional’s Mobile CAD Solution
ArchKit Design is engineered specifically for the fast-paced environment of a physical jobsite. It utilizes LiDAR sensors to automate the capture of every kitchen layout dimensions, identifying structural variances that manual tools miss. You can pull from an integrated catalog of standard U.S. cabinet sizes to build out 2D and 3D layouts on the fly. Presenting a 3D kitchen visualizer during the first visit transforms your sales process. It replaces vague promises with a concrete, interactive design that secures client buy-in immediately.
Next Steps for High-Efficiency Contractors
The transition from manual sketching to digital precision is the fastest way to scale your business. Modern technology removes the burden of stationary office equipment and empowers you to manage the entire design process from your mobile device. By adopting a LiDAR-first workflow, you minimize material waste and protect your profit margins from the cost of field errors. Ready to modernize your process? Get Early Access to ArchKit Design today and start delivering error-free layouts with total confidence.
Future-Proof Your Kitchen Remodels for 2026
Precision on the jobsite is the difference between a high-margin project and a week of unpaid rework. You have mastered the critical kitchen layout dimensions required for code compliance and user comfort, from the 36 inch walkway baseline to the 18 inch backsplash rule. Adhering to these standards ensures your designs are functional, safe, and built to last. Now, it's time to move beyond the limitations of manual tape measures and hand-drawn sketches.
Modernizing your workflow with digital tools ensures that every cabinet order is accurate to the fraction of an inch. By leveraging LiDAR-powered accuracy and a comprehensive U.S. standard cabinet catalog, you can eliminate the administrative fatigue of office-dependent drafting. Generate instant 2D and 3D layouts directly on-site to align client expectations before you even pack up your tools. This efficiency doesn't just save time; it builds a more professional business that secures more contracts.
Take control of your next site visit and eliminate measurement errors for good. Get Early Access to ArchKit and Master Your Kitchen Measurements. Deliver results that impress and keep your projects moving at high velocity.
Frequently Asked Questions
What is the standard height for a kitchen island?
The standard finished height for a kitchen island is 36 inches. This matches the height of your perimeter base cabinets and creates a continuous work surface. If the client requests a bar-height seating area, you should plan for a 42 inch finished height. Always verify the floor levelness on-site to ensure your shims and toe kicks accommodate any structural slopes.
How much space should be between a kitchen island and the counter?
Maintain a minimum of 42 inches for a single-cook layout and 48 inches for kitchens with multiple users. These kitchen layout dimensions prevent collisions when cabinet doors or drawers are fully extended. Use LiDAR scanning during your initial walkthrough to verify these clearances against the actual wall positions. Proper spacing ensures the island remains a functional asset rather than a traffic bottleneck.
What are the standard dimensions for a kitchen sink base cabinet?
Standard sink base cabinets are typically 30, 33, or 36 inches wide. The 36 inch model is the professional benchmark for accommodating double-bowl or large farmhouse sinks. The depth is a standard 24 inches to match your base cabinet run. Always verify the sink manufacturer's template against your plumbing rough-in height to avoid interference with the drain and supply lines.
How far should a refrigerator sit from the wall for proper ventilation?
Allow for at least 1 inch of clearance at the top and back, and 1/8 to 1/4 inch on the sides. While many modern units vent from the bottom front, these gaps prevent heat buildup and ensure the compressor runs efficiently. Neglecting these manufacturer-specified clearances can void warranties and lead to premature appliance failure. Document these specs in your mobile layout software to avoid framing errors.
Can I use an iPad to measure kitchen layout dimensions accurately?
You can use an iPad Pro or iPhone Pro equipped with LiDAR to capture kitchen layout dimensions with high precision. ArchKit utilizes these sensors to generate 2D and 3D floor plans directly on the jobsite. This digital workflow replaces manual tape measurements and catches wall bows or floor variances that manual tools often miss. It's the fastest way to move from measurement to estimate.
What is the minimum walkway width for a wheelchair-accessible kitchen?
The minimum clear passage width is 36 inches for a wheelchair-accessible kitchen. However, for a 180-degree turn, you must provide a 60 inch diameter of clear floor space. Universal design also requires lower counter heights, usually capped at 34 inches, and open knee space under sinks and cooktops. Prioritizing these clearances during the design phase ensures the kitchen remains code-compliant and inclusive.
How much clearance is needed for a dishwasher door to open fully?
Ensure you have at least 21 inches of clear floor space in front of the dishwasher. This allows the door to drop fully without hitting an island or an opposing run of cabinets. If the dishwasher is placed in a corner, maintain at least 9 inches of space from the perpendicular cabinet run. This prevents the dishwasher door from colliding with cabinet hardware or appliance handles.
What are the standard dimensions for a microwave cabinet?
Standard microwave cabinets are typically 24, 27, or 30 inches wide. The depth usually ranges from 18 to 24 inches depending on whether the unit is a built-in model or sits on a shelf. Always account for the specific trim kit dimensions and required airflow gaps specified by the manufacturer. Accurate planning prevents the need for field modifications once the appliances arrive on-site.


